

In a few previous posts (Part 1, Part 2, and Part 3), we covered the basics of designing a secure Over-the-Air Device Firmware Update (OTA DFU) process, an overview of the Nordic nRF52 OTA DFU process, as well as testing out one of the DFU examples included in the nRF5 SDK.
In this tutorial, we will be going over the complete steps of how to integrate the Nordic Buttonless DFU into our own application to enable OTA DFU functionality and be able to update the device in the field over Bluetooth Low Energy.
Prerequisites:
There are a few required hardware and software elements for our tutorial:
Hardware Requirements
- A development PC (Windows, macOS, or Linux) – for building the bootloader and application, and generating cryptographic keys.
- One nRF52-based development kit – used as the DFU target
(Note: we’ll be using an nRF52840 DK as our target device). - A mobile phone (iOS or Android) – used as the DFU controller
(alternatively, you could use a second nRF52 DK along with your development PC and use the Bluetooth Low Energy app within nRF Connect for Desktop)
Software Requirements
- nRF5 SDK (version 17.1.0) – download and unzip the SDK to a folder of your choice.
- Segger Embedded Studio – download and install to your PC.
- nRF Command Line Tools (nrfjprog) – download and install to your PC.
- nrfutil (Python dependent) – needed for generating the cryptography keys and the DFU packages.
- If you are using a DK other than the nRF52840, then you may need to install micro-ecc. On nRF52840, you can use the CC310 crypto engine which is hardware supported by this DK.
- nRF Connect for Mobile (iOS, or Android) or nRF Connect for Desktop if you’re using a PC as the DFU controller. You may also use nrfutil connected via a second nRF52 DK to act as the DFU controller to the target device (refer to the documentation here).
Once you have all these requirements satisfied, you can follow along with the steps laid out next.
1. Adding the Buttonless DFU service and functionality to an nRF52 example
Our first step is to add the Buttonless DFU service to our application. We'll be using the ble_app_blinky example within the nRF5 SDK (v 17.1.0).
We'll be using the Unbonded version of the Buttonless DFU implementation.
The Nordic Buttonless DFU functionality allows the device to expose the DFU GATT Service alongside your application’s GATT Services and be able to go into DFU mode from within the Application running on your device, instead of requiring bootup into DFU mode (via physical button presses).
In Segger Embedded Studio, open the example's SES Project Solution located at <nRF5 SDK>/examples/ble_peripheral/ble_app_blinky/pca11056/s140/ses/ble_app_blinky_pca10056_s140.emProject.
You can also make a copy of the example before making any changes if you want to preserve the original example.
Then make sure that you can build it successfully.
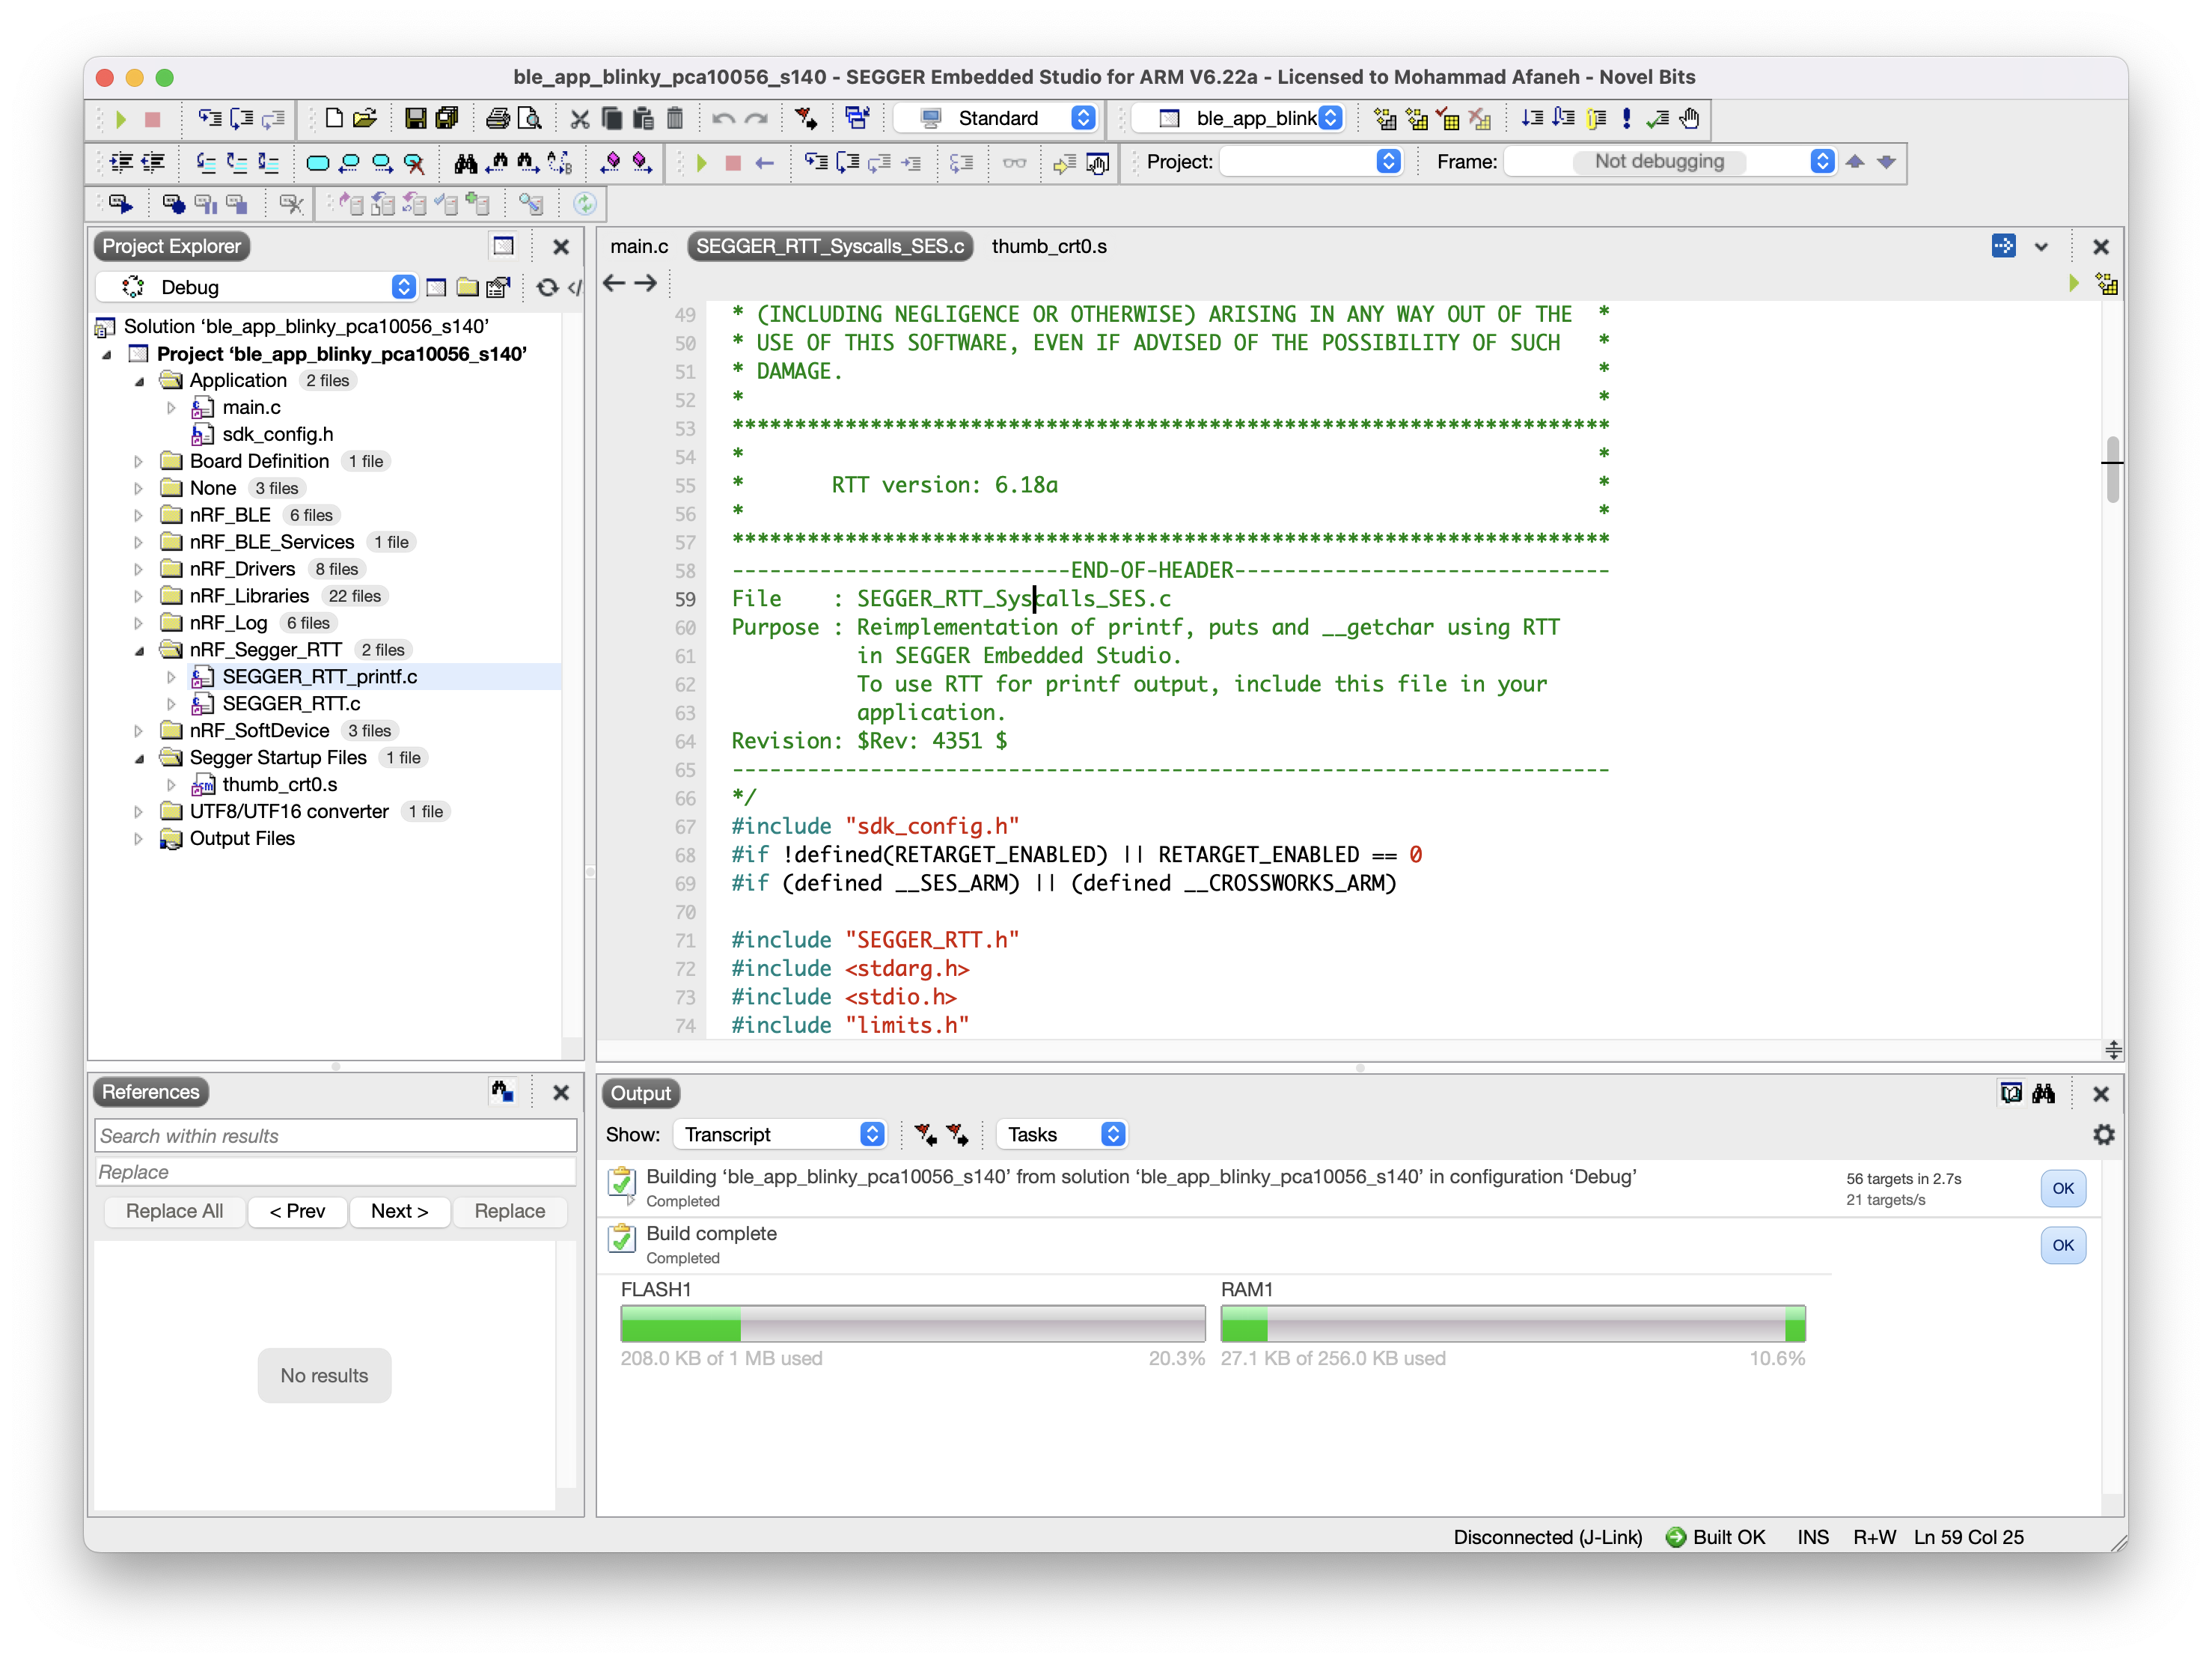
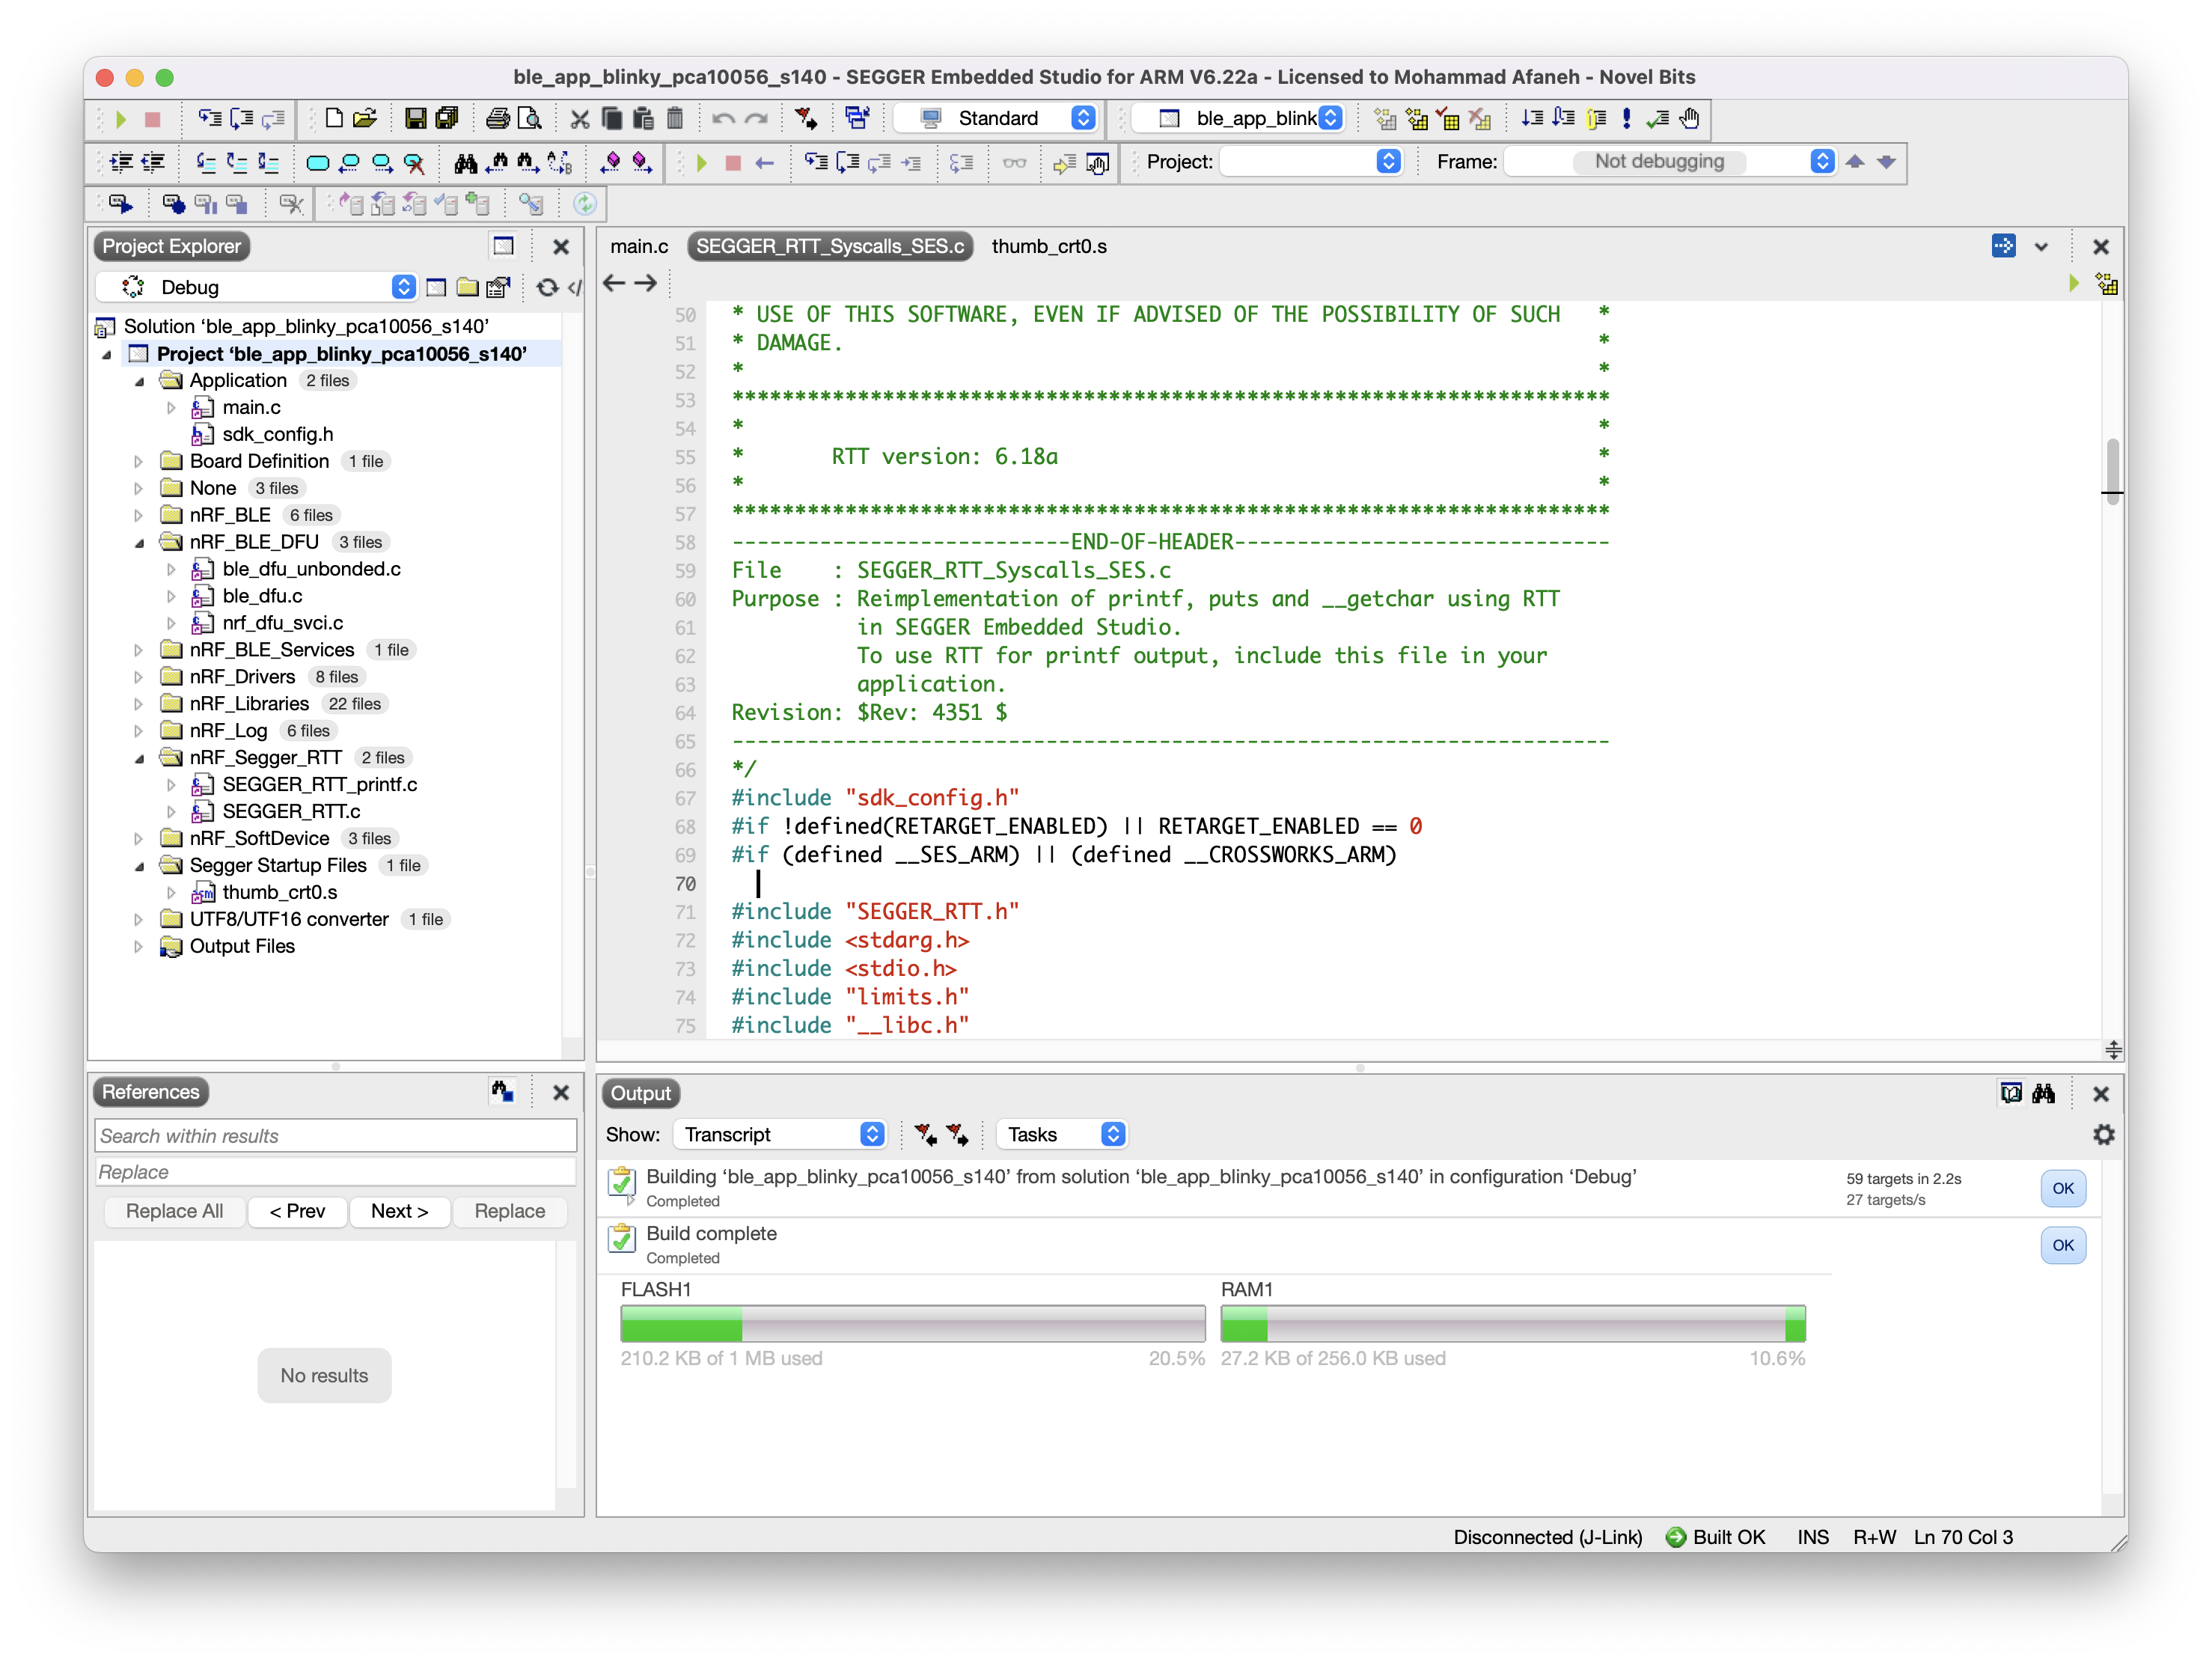
Note: If you are using a newer version of Segger Embedded Studio (I believe > V6.0), you may encounter the following error when building the solution: "__vfprintf.h: No such file or directory".
To fix this, simply remove the file SEGGER_RTT_Syscalls_SES.c (under the nRF_Segger_RTT folder) from the Project and rebuild.
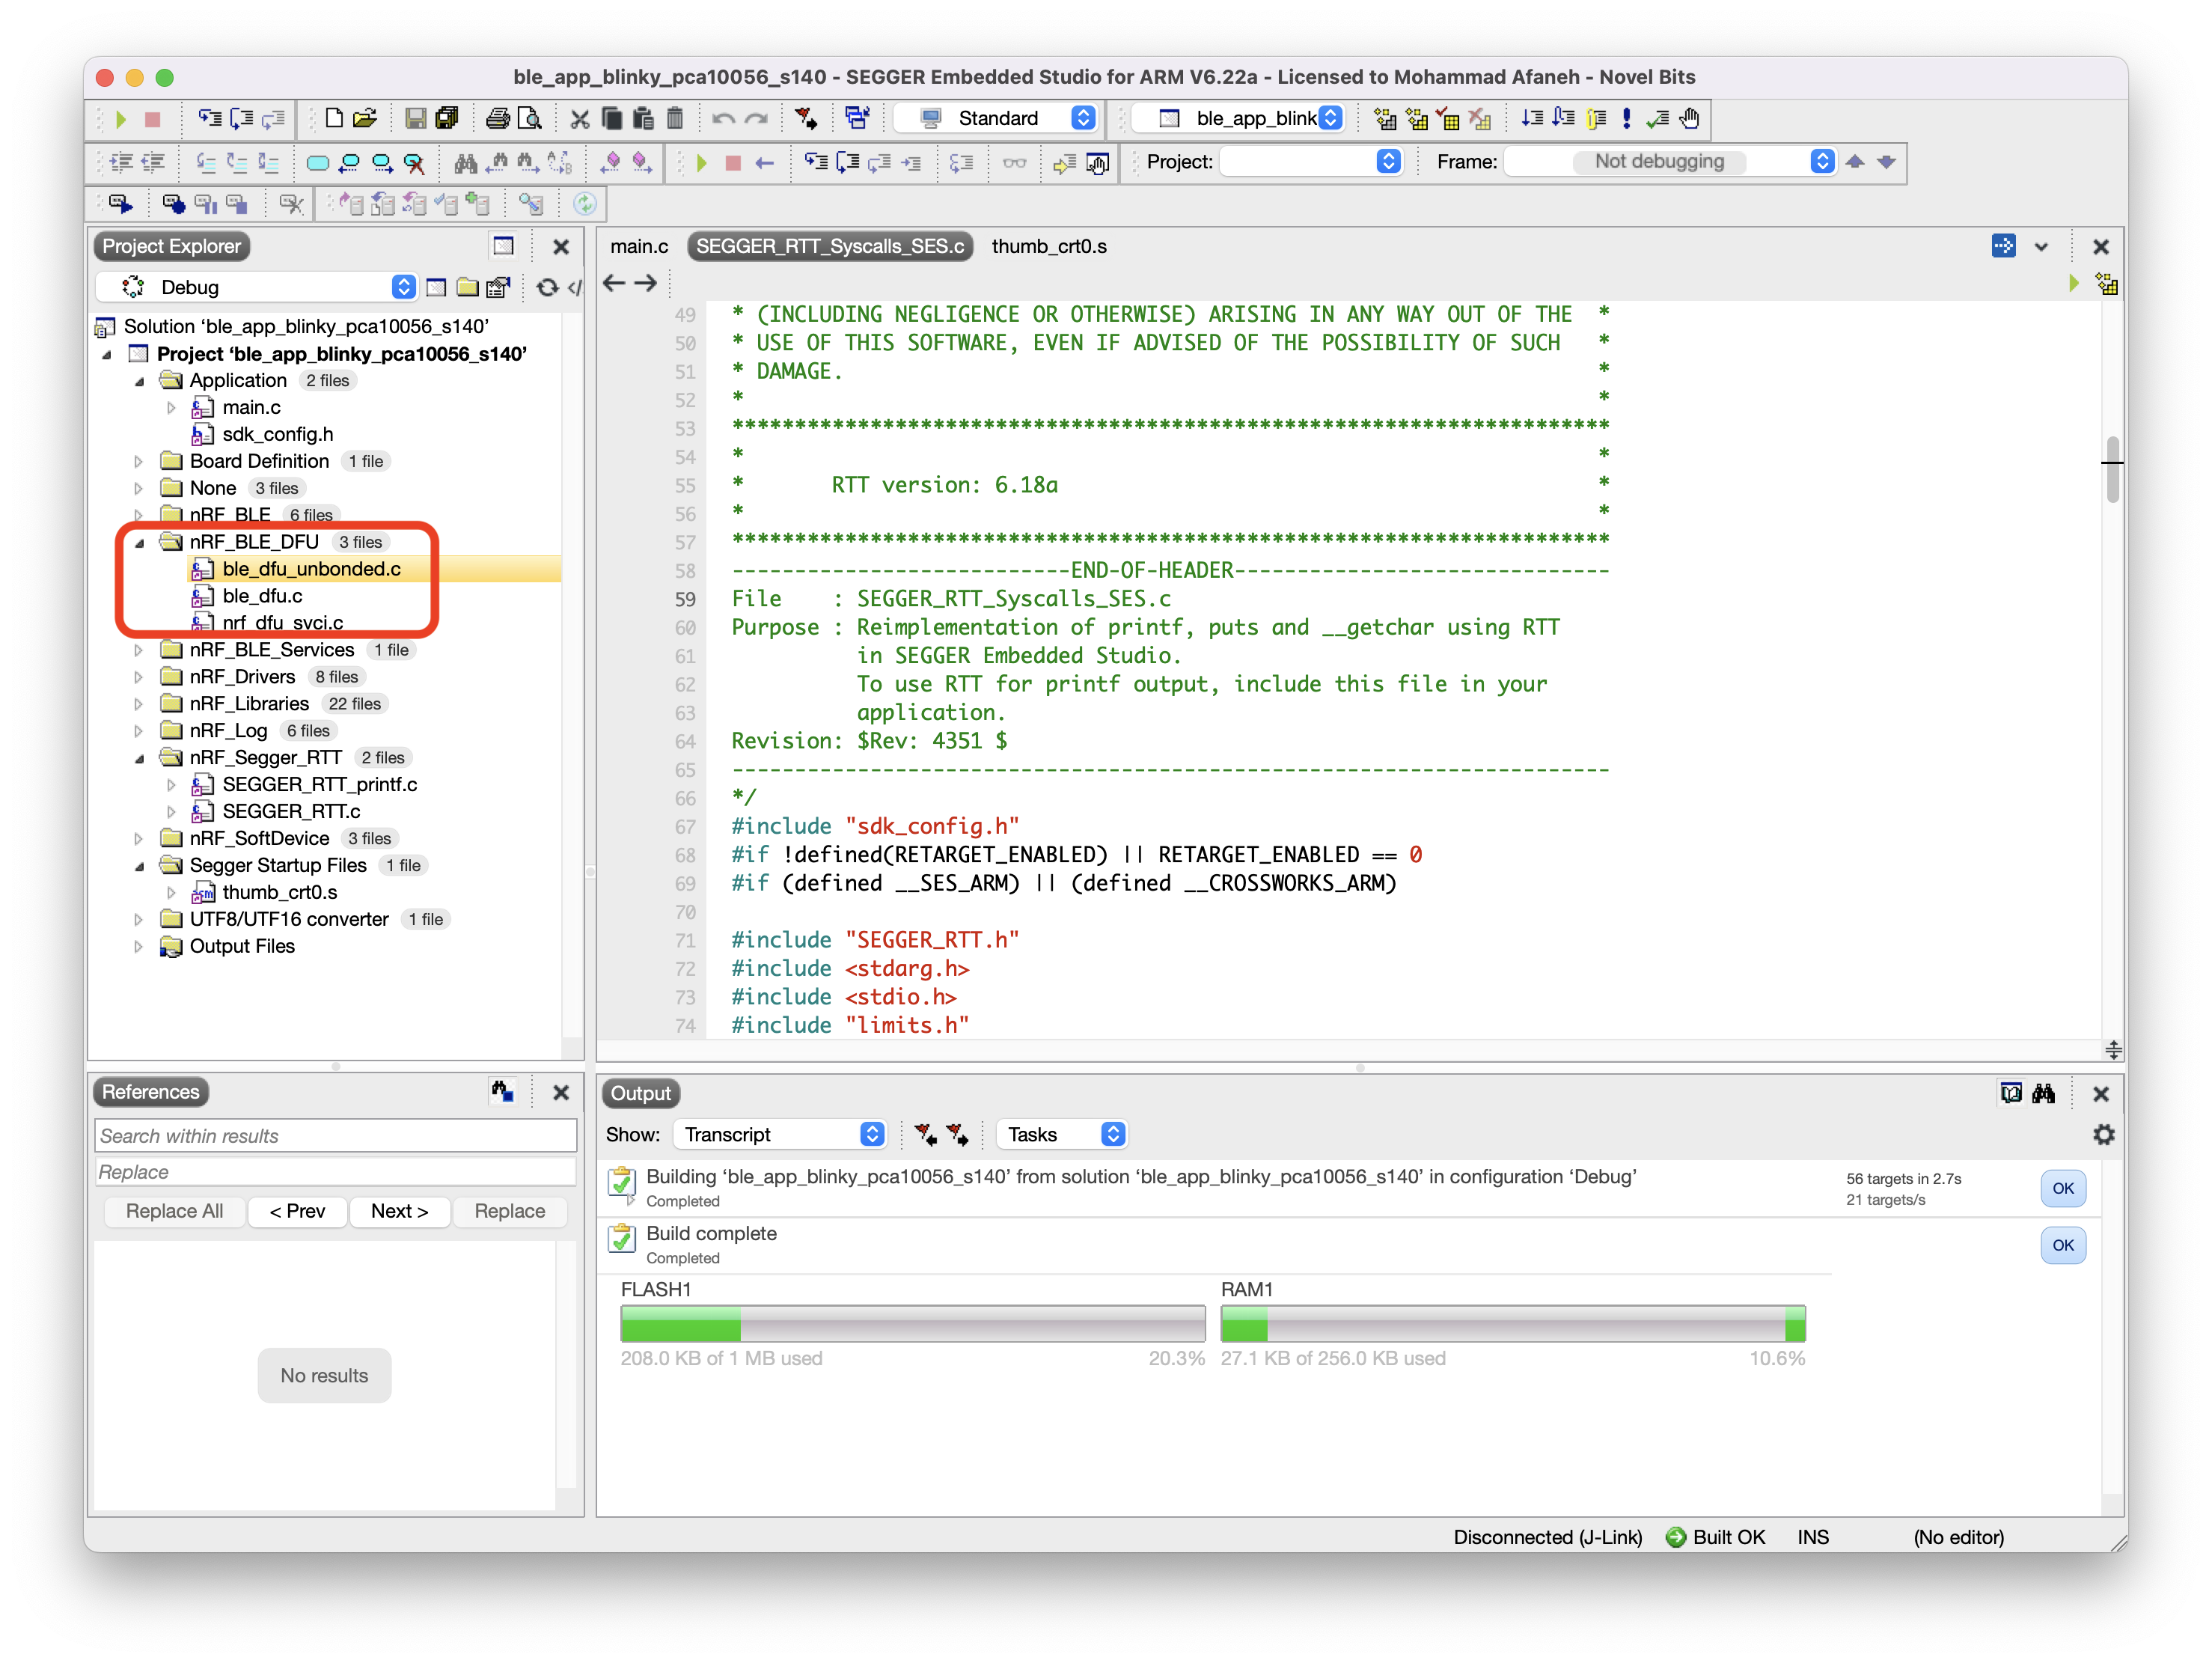
We'll first need to add a few files to the project. We can create a new folder within the project to host these files:
<SDK Folder>/components/ble/ble_services/ble_dfu/ble_dfu_bonded.c<SDK Folder>/components/ble/ble_services/ble_dfu/ble_dfu_unbonded.c<SDK Folder>/components/ble/ble_services/ble_dfu/ble_dfu.c<SDK Folder>/components/libraries/bootloader/dfu/nrf_dfu_svci.c
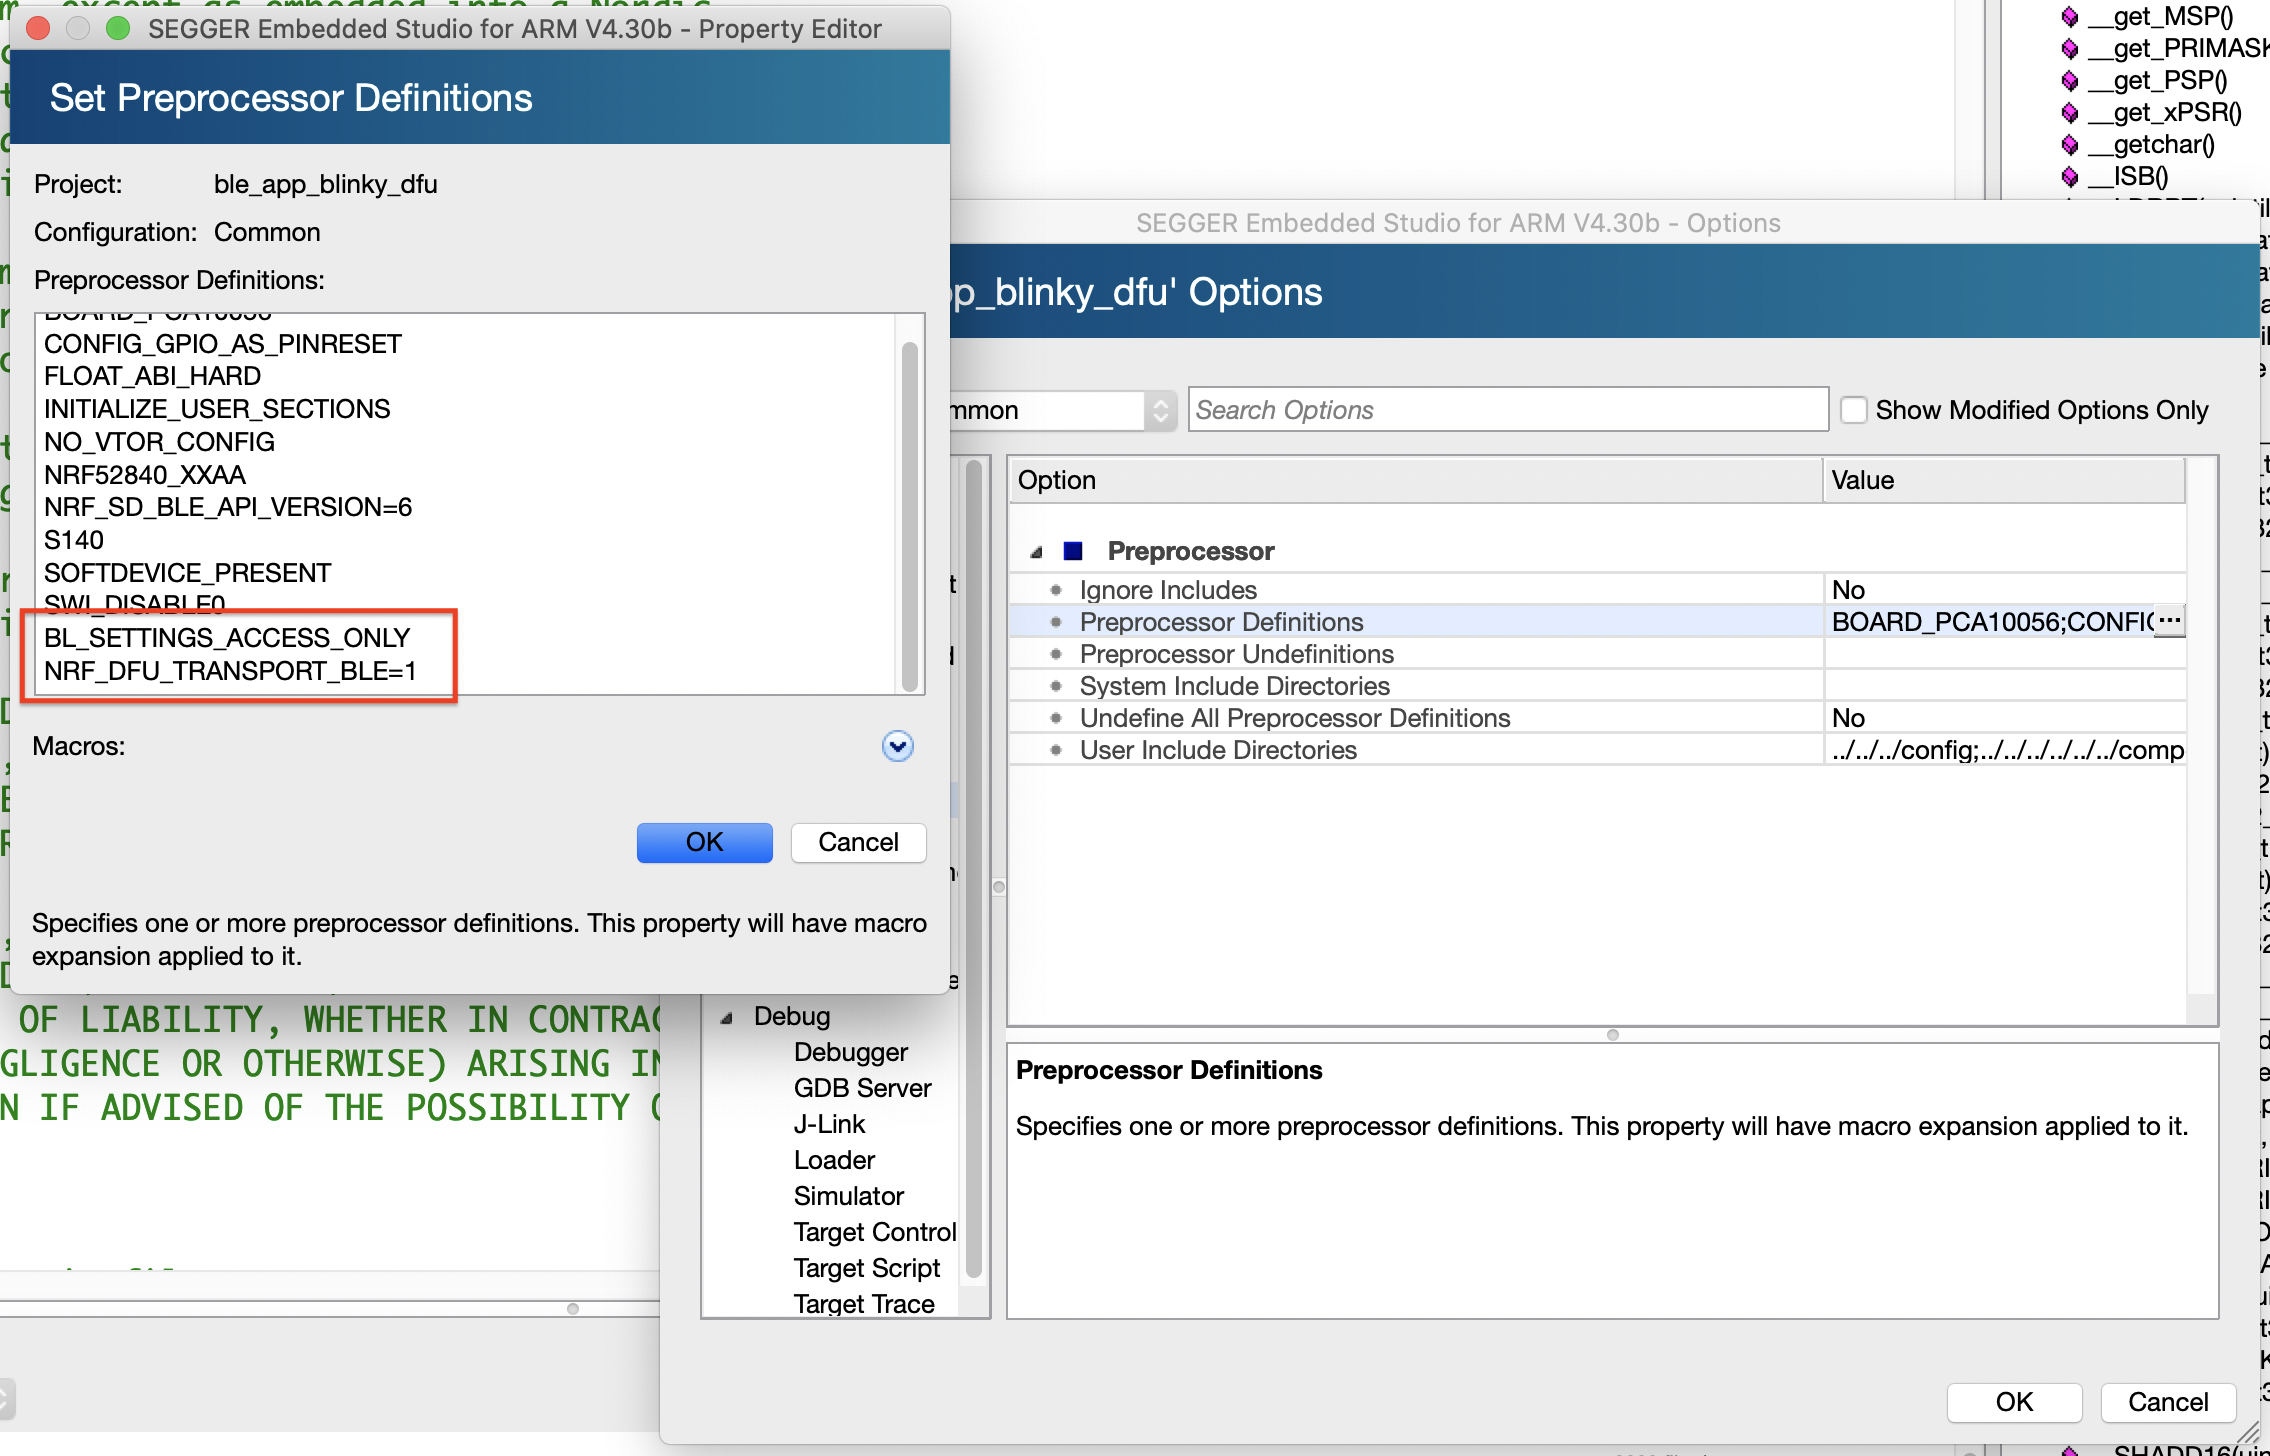
Then we'll have to add a few DFU preprocessor definitions. To do this, right-click on the Project in the Project Explorer window → Click Options → Choose the "Common" configuration → click on "Preprocessor" → "Preprocessor Definitions" and add the following:
BL_SETTINGS_ACCESS_ONLY(limits access to the Bootloader settings to access-only since we'll be generating the Bootloader settings and writing them along with the Bootloader, SoftDevice, and Application).NRF_DFU_TRANSPORT_BLE = 1
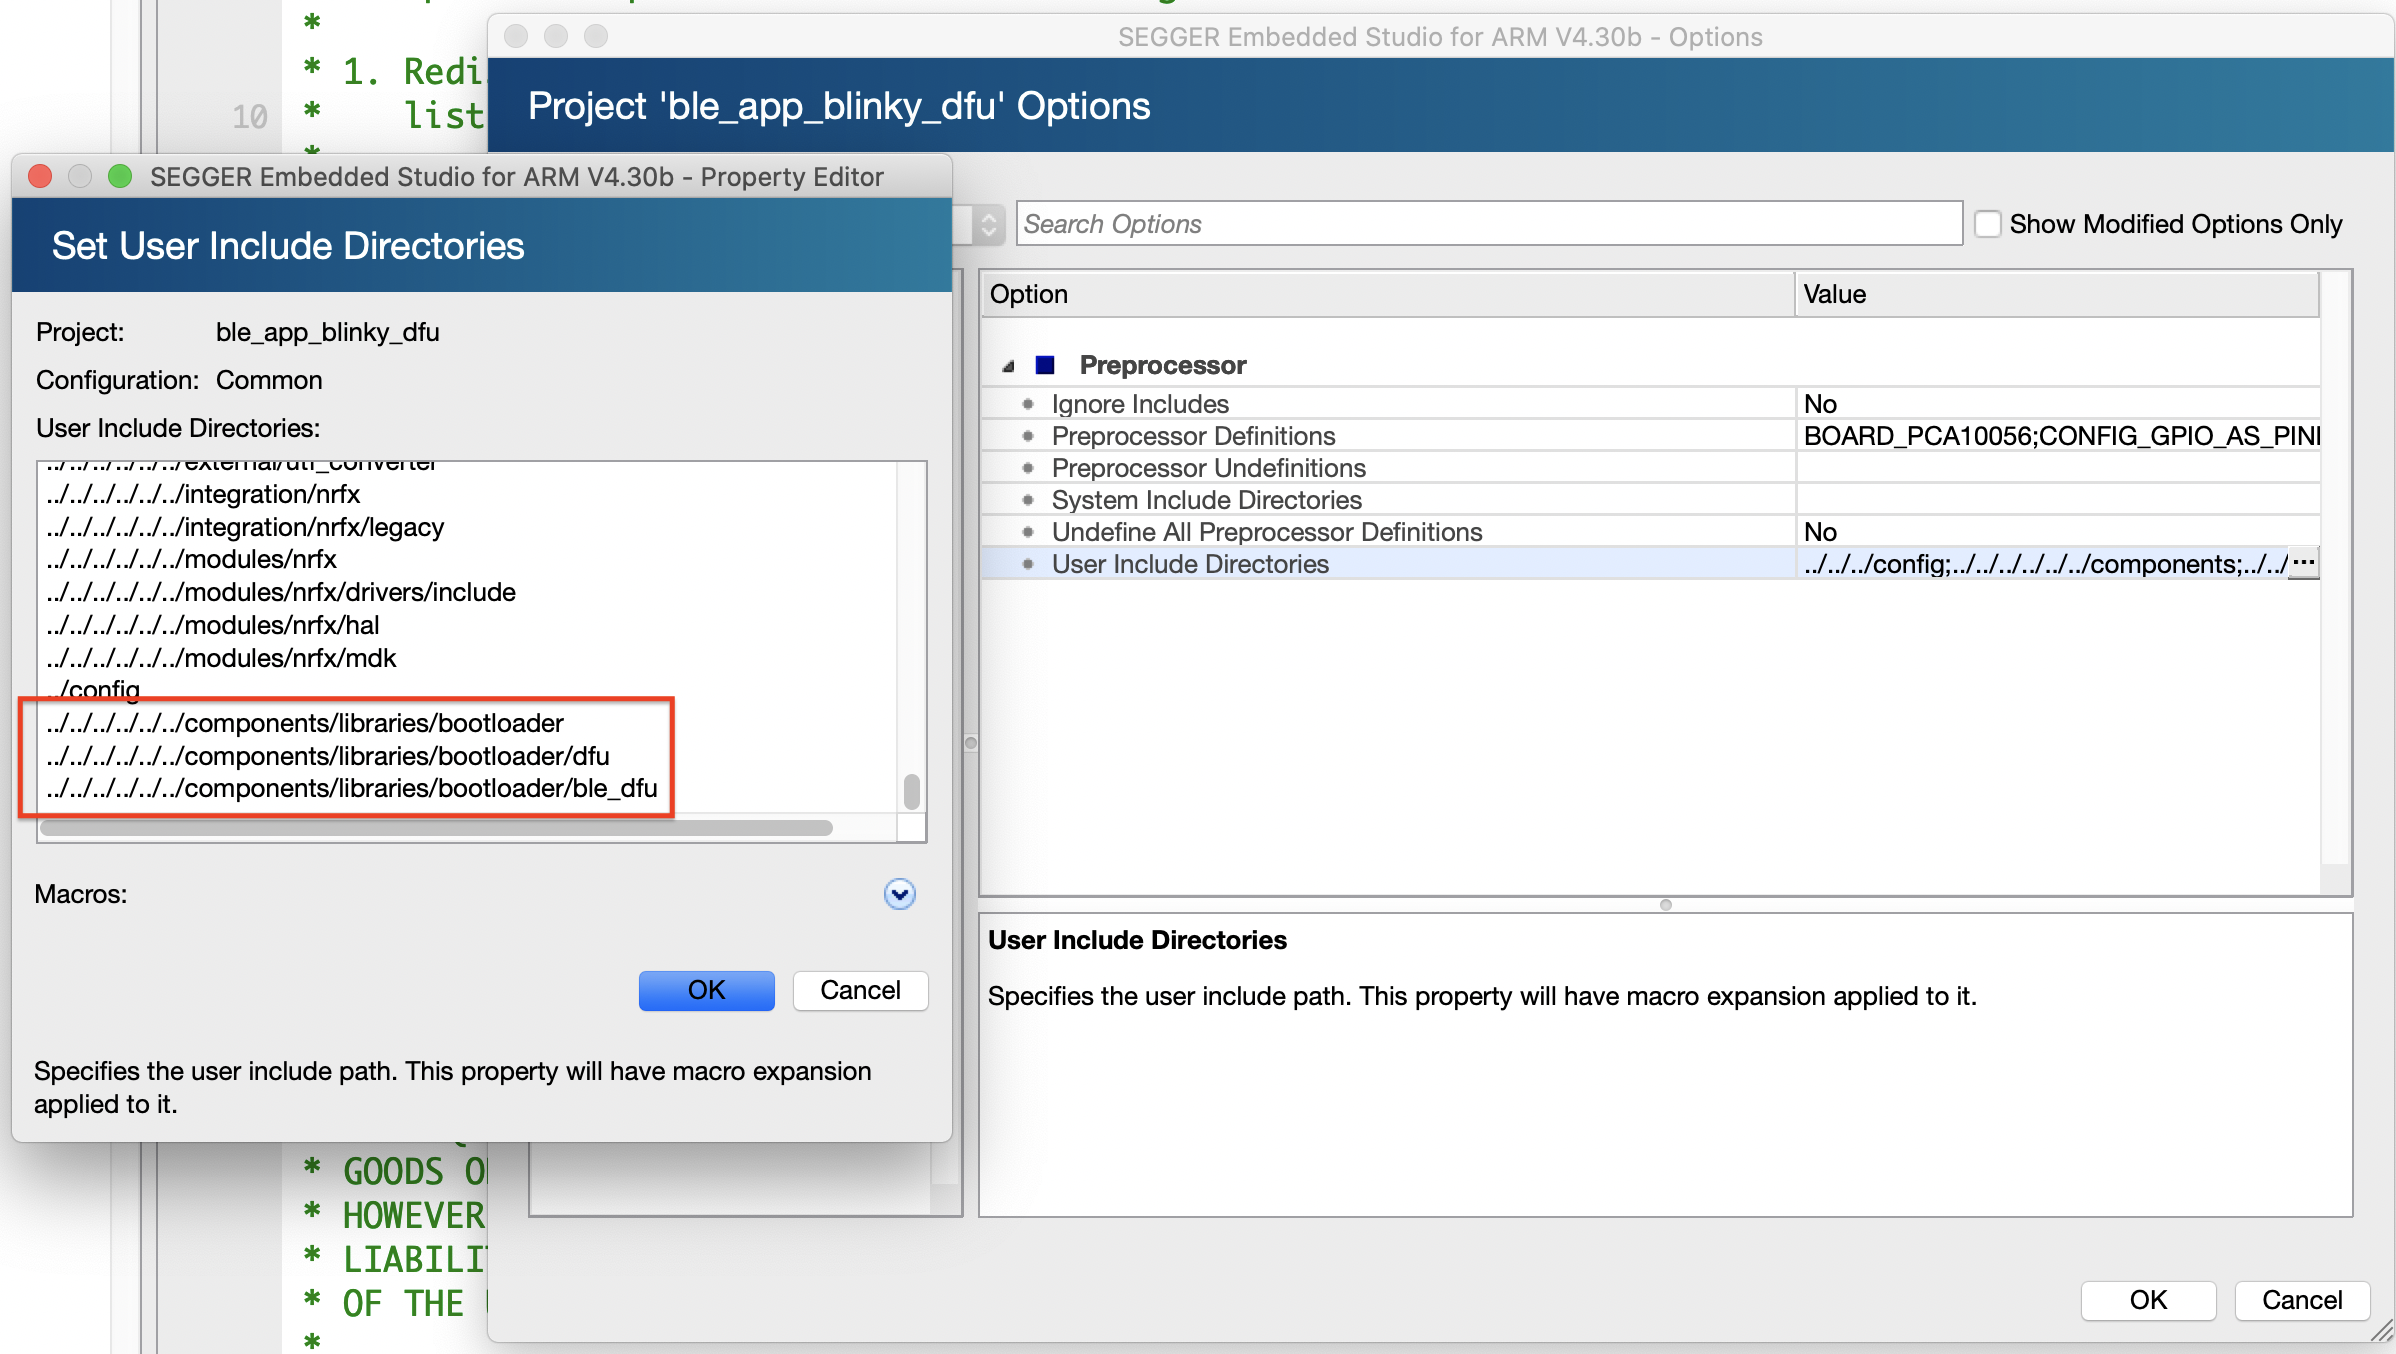
Next we'll add a few include folders that host the header files needed for DFU:
<SDK Folder>/components/libraries/bootloader<SDK Folder>/components/libraries/bootloader/dfu<SDK Folder>/components/libraries/bootloader/ble_dfu
Before we move on, let's make sure the application builds successfully:
Next, we'll be modifying/enabling some of the definitions in sdk_config.h:
#define BLE_DFU_ENABLED 1#define NRF_PWR_MGMT_CONFIG_AUTO_SHUTDOWN_RETRY 1#define NRF_SDH_BLE_SERVICE_CHANGED 1
Then we'll be adding/modifying some code in main.c:
Add #includes for the following:
// DFU-related #includes
#include "nrf_power.h"
#include "nrf_dfu_ble_svci_bond_sharing.h"
#include "nrf_svci_async_function.h"
#include "nrf_svci_async_handler.h"
#include "ble_dfu.h"
#include "nrf_bootloader_info.h"
Add the following three functions (taken from the DFU Buttonless example ble_app_buttonless_dfu within the nRF5 SDK):
app_shutdown_handler()
/**@brief Handler for shutdown preparation. * * @details During shutdown procedures, this function will be called at a 1 second interval *          untill the function returns true. When the function returns true, it means that the *          app is ready to reset to DFU mode. * * @param[in]   event   Power manager event. * * @retval  True if shutdown is allowed by this power manager handler, otherwise false. */ static bool app_shutdown_handler(nrf_pwr_mgmt_evt_t event) {
    switch (event) {
        case NRF_PWR_MGMT_EVT_PREPARE_DFU: NRF_LOG_INFO("Power management wants to reset to DFU mode.");
        // YOUR_JOB: Get ready to reset into DFU mode // // If you aren't finished with any ongoing tasks, return "false" to // signal to the system that reset is impossible at this stage. // // Here is an example using a variable to delay resetting the device. // // if (!m_ready_for_reset) // {
            //      return false;
            //
        } // else //{
        // //    // Device ready to enter //    uint32_t err_code;
        //    err_code = sd_softdevice_disable();
        //    APP_ERROR_CHECK(err_code);
        //    err_code = app_timer_stop_all();
        //    APP_ERROR_CHECK(err_code);
        //
    } break;
default: // YOUR_JOB: Implement any of the other events available from the power management module: //      -NRF_PWR_MGMT_EVT_PREPARE_SYSOFF //      -NRF_PWR_MGMT_EVT_PREPARE_WAKEUP //      -NRF_PWR_MGMT_EVT_PREPARE_RESET return true;
} NRF_LOG_INFO("Power management allowed to reset to DFU mode.");
return true;
}
buttonless_dfu_sdh_state_observer()
/**@brief Register application shutdown handler with priority 0. */ NRF_PWR_MGMT_HANDLER_REGISTER(app_shutdown_handler, 0);
static void buttonless_dfu_sdh_state_observer(nrf_sdh_state_evt_t state, void * p_context) {
    if (state == NRF_SDH_EVT_STATE_DISABLED) {
        // Softdevice was disabled before going into reset. Inform bootloader to skip CRC on next boot. nrf_power_gpregret2_set(BOOTLOADER_DFU_SKIP_CRC);
        //Go to system off. nrf_pwr_mgmt_shutdown(NRF_PWR_MGMT_SHUTDOWN_GOTO_SYSOFF);
    }
}
ble_dfu_buttonless_evt_handler()
/* nrf_sdh state observer. */ NRF_SDH_STATE_OBSERVER(m_buttonless_dfu_state_obs, 0) = {
    .handler = buttonless_dfu_sdh_state_observer,
};
static void ble_dfu_buttonless_evt_handler(ble_dfu_buttonless_evt_type_t event) {
    ret_code_t    err_code;
    switch (event) {
        case BLE_DFU_EVT_BOOTLOADER_ENTER_PREPARE: NRF_LOG_INFO("Device is preparing to enter bootloader mode\r\n");
        break;
        case BLE_DFU_EVT_BOOTLOADER_ENTER: NRF_LOG_INFO("Device will enter bootloader mode\r\n");
        break;
        case BLE_DFU_EVT_BOOTLOADER_ENTER_FAILED: NRF_LOG_ERROR("Device failed to enter bootloader mode\r\n");
        break;
        default: NRF_LOG_INFO("Unknown event from ble_dfu.\r\n");
        break;
    }
}
Add the following highlighted lines to services_init():
/**@brief Function for initializing services that will be used by the application. */ static void services_init(void) {
    ret_code_t         err_code;
    ble_lbs_init_t     init     = {
        0
    };
nrf_ble_qwr_init_t qwr_init = {
    0
};
// Initialize Queued Write Module. qwr_init.error_handler = nrf_qwr_error_handler;
err_code = nrf_ble_qwr_init(&m_qwr, &qwr_init);
APP_ERROR_CHECK(err_code);
// Initialize LBS. init.led_write_handler = led_write_handler;
err_code = ble_lbs_init(&m_lbs, &init);
APP_ERROR_CHECK(err_code);
// Initialize the DFU service ble_dfu_buttonless_init_t dfus_init = {
    .evt_handler = ble_dfu_buttonless_evt_handler
};
err_code = ble_dfu_buttonless_init(&dfus_init);
APP_ERROR_CHECK(err_code);
}
Add the following highlighted lines to main():
/**@brief Function for application main entry. */ int main(void) {
    ret_code_t err_code;
    // Initialize. log_init();
    // Initialize the async SVCI interface to bootloader before any interrupts are enabled. err_code = ble_dfu_buttonless_async_svci_init();
    APP_ERROR_CHECK(err_code);
    leds_init();
    timers_init();
    buttons_init();
    power_management_init();
    ble_stack_init();
    gap_params_init();
    gatt_init();
    services_init();
    advertising_init();
    conn_params_init();
    // Start execution. NRF_LOG_INFO("Blinky example started.");
    advertising_start();
    // Enter main loop. for (;;) {
        idle_state_handle();
    }
}
2. Generating the private-public key pair used for signing the firmware image
For this type of modified application in which we combined the DFU service, we can't simply program the application and softdevice from SES and call it a day!
Instead, we have to create a special firmware hex image file and then flash it to the DK.
Let's first create a folder to host all the contents and files needed for our DFU process. We'll call it dfu_images.
To create a private-public key pair to be used for signing/validating the firmware image, we run the following command in the dfu folder we initially created:
nrfutil keys generate private.keyThis will generate the key pair.
Note: It's important to make sure the private.key file is secured and kept in a safe location not accessible by any unauthorized third parties.
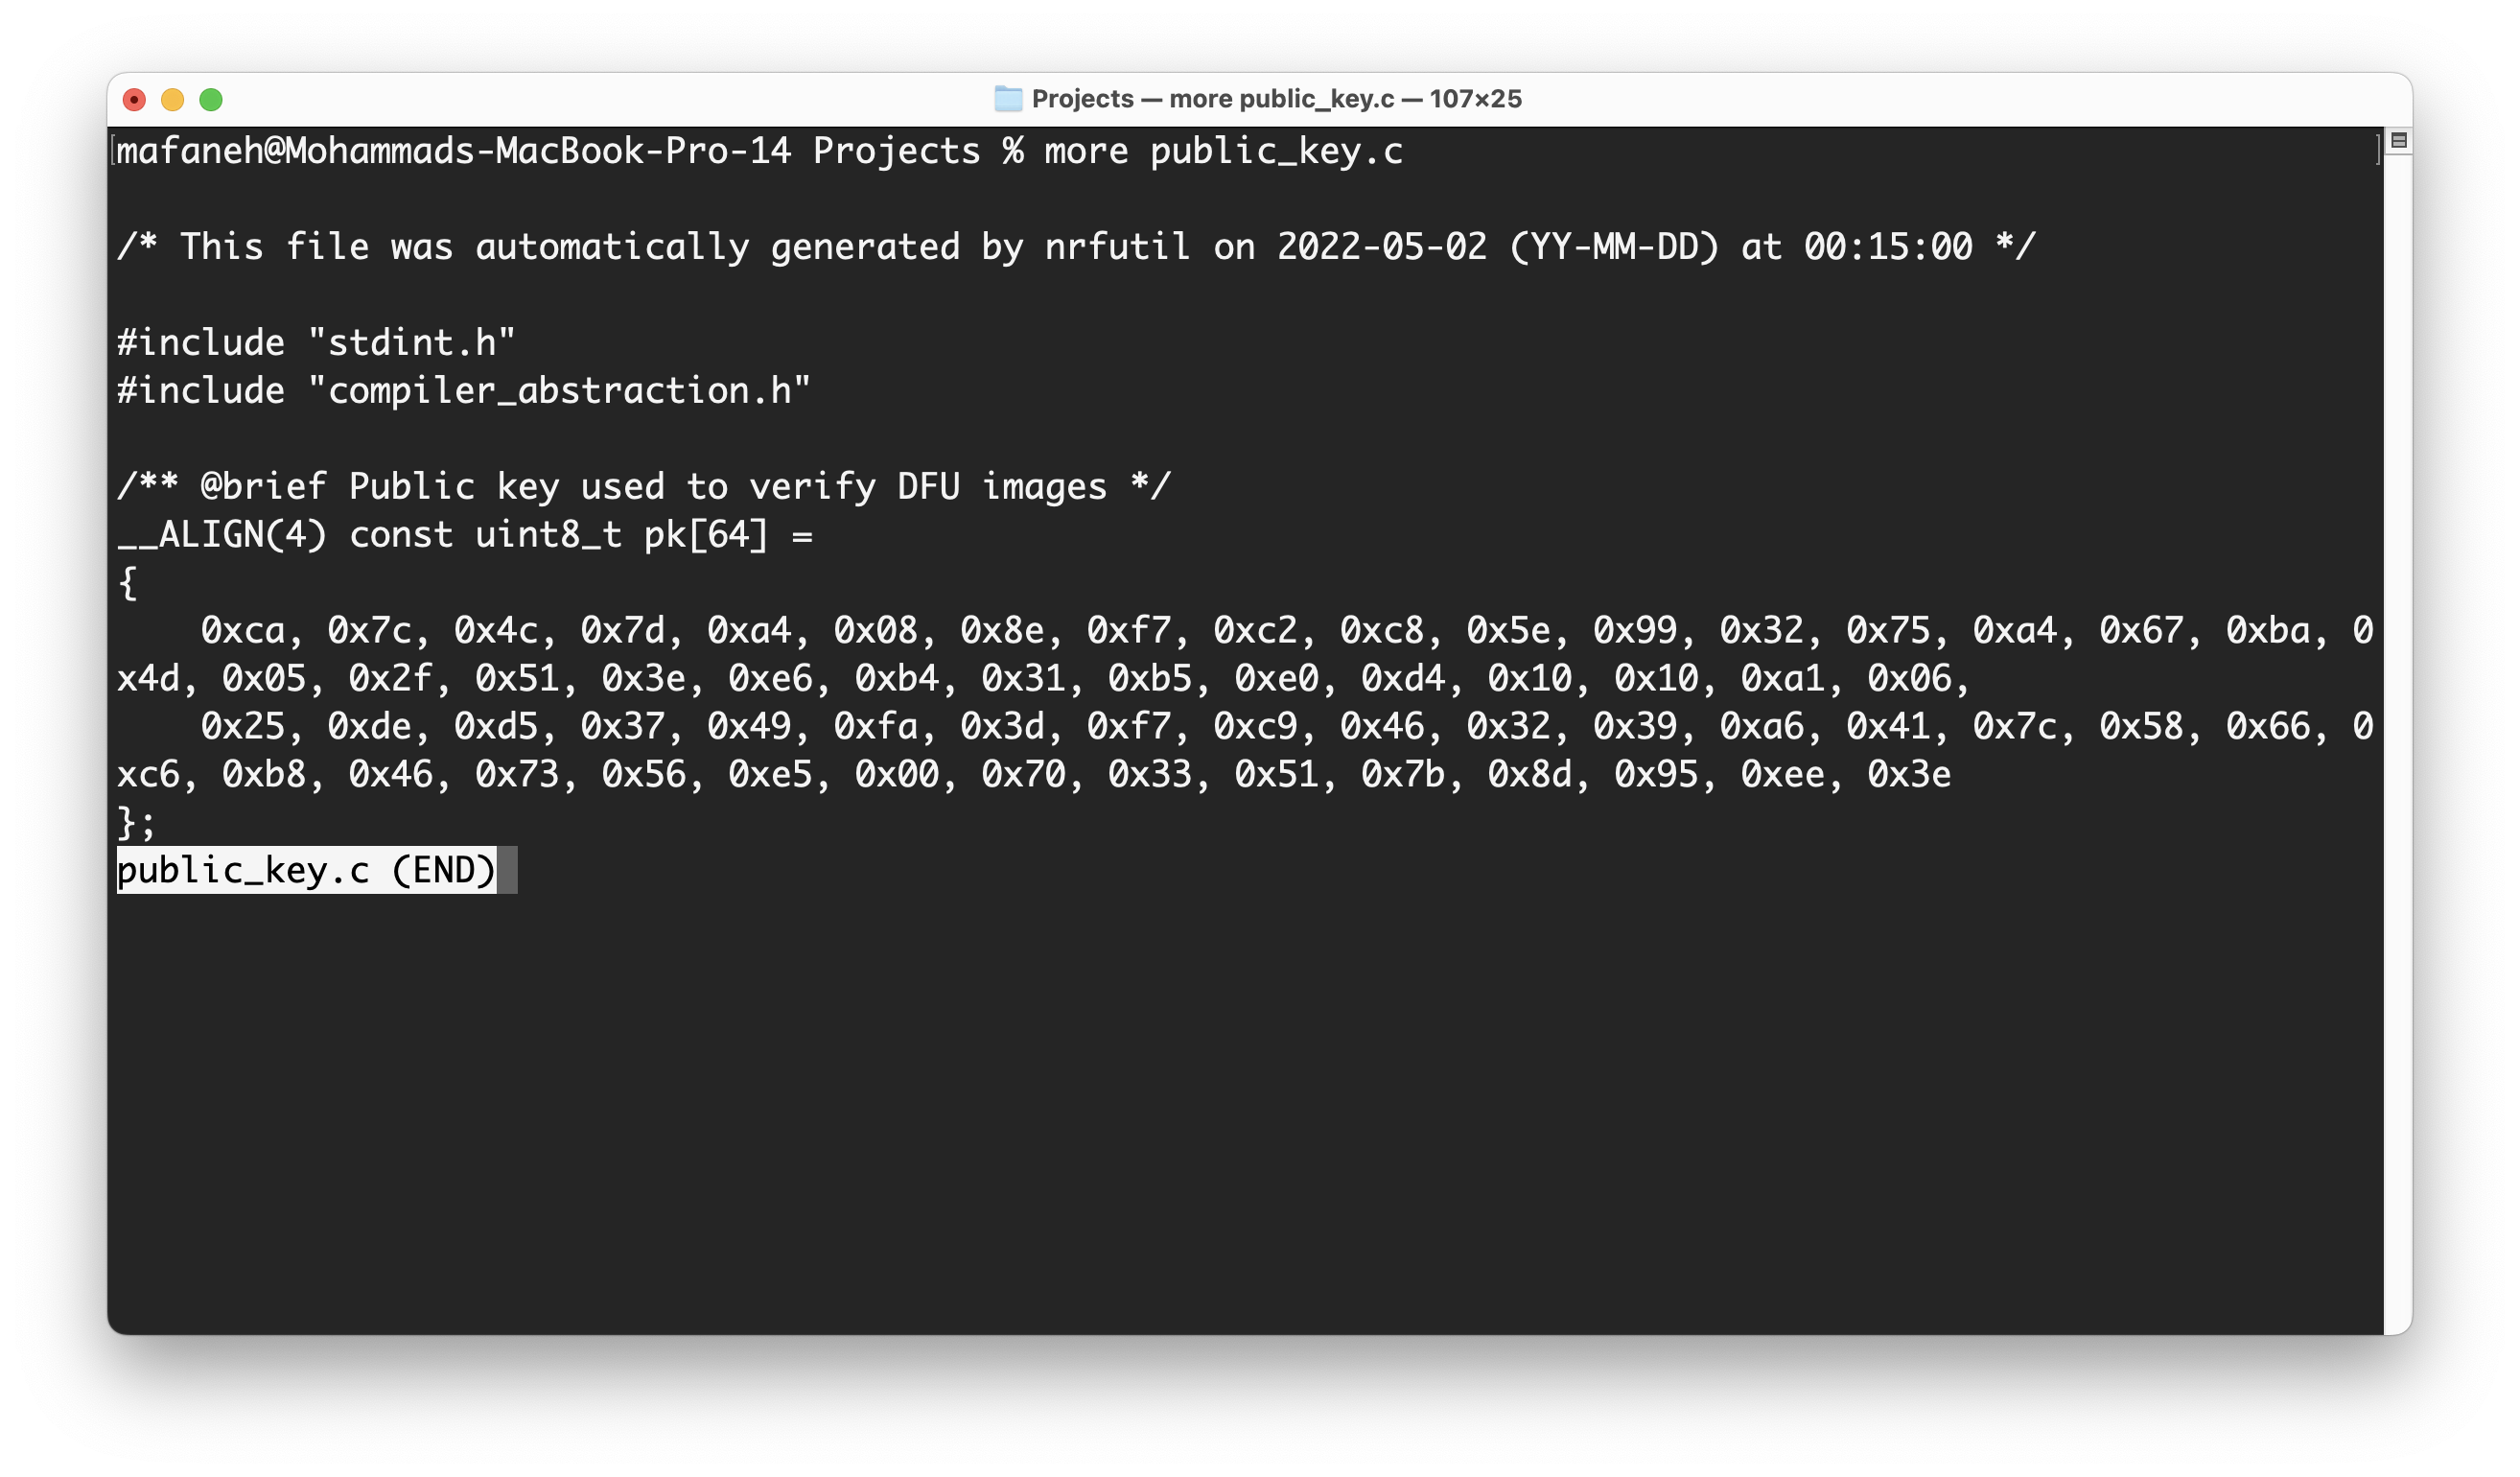
nrfutil also provides a handy command to generate the public key source file that we can copy/paste into the bootloader project before building the bootloader. The command is as follows:
nrfutil keys display --key pk --format code private.key --out_file public_key.cOnce completed, we can view the contents of public_key.c:
Now we are ready to integrate this into the bootloader and build it.
Open the SES Project for the bootloader located at <nRF5 SDK>/examples/dfu/secure_bootloader/pca10056_s140_ble/ses/secure_bootloader_ble_s140_pca10056.emProject.
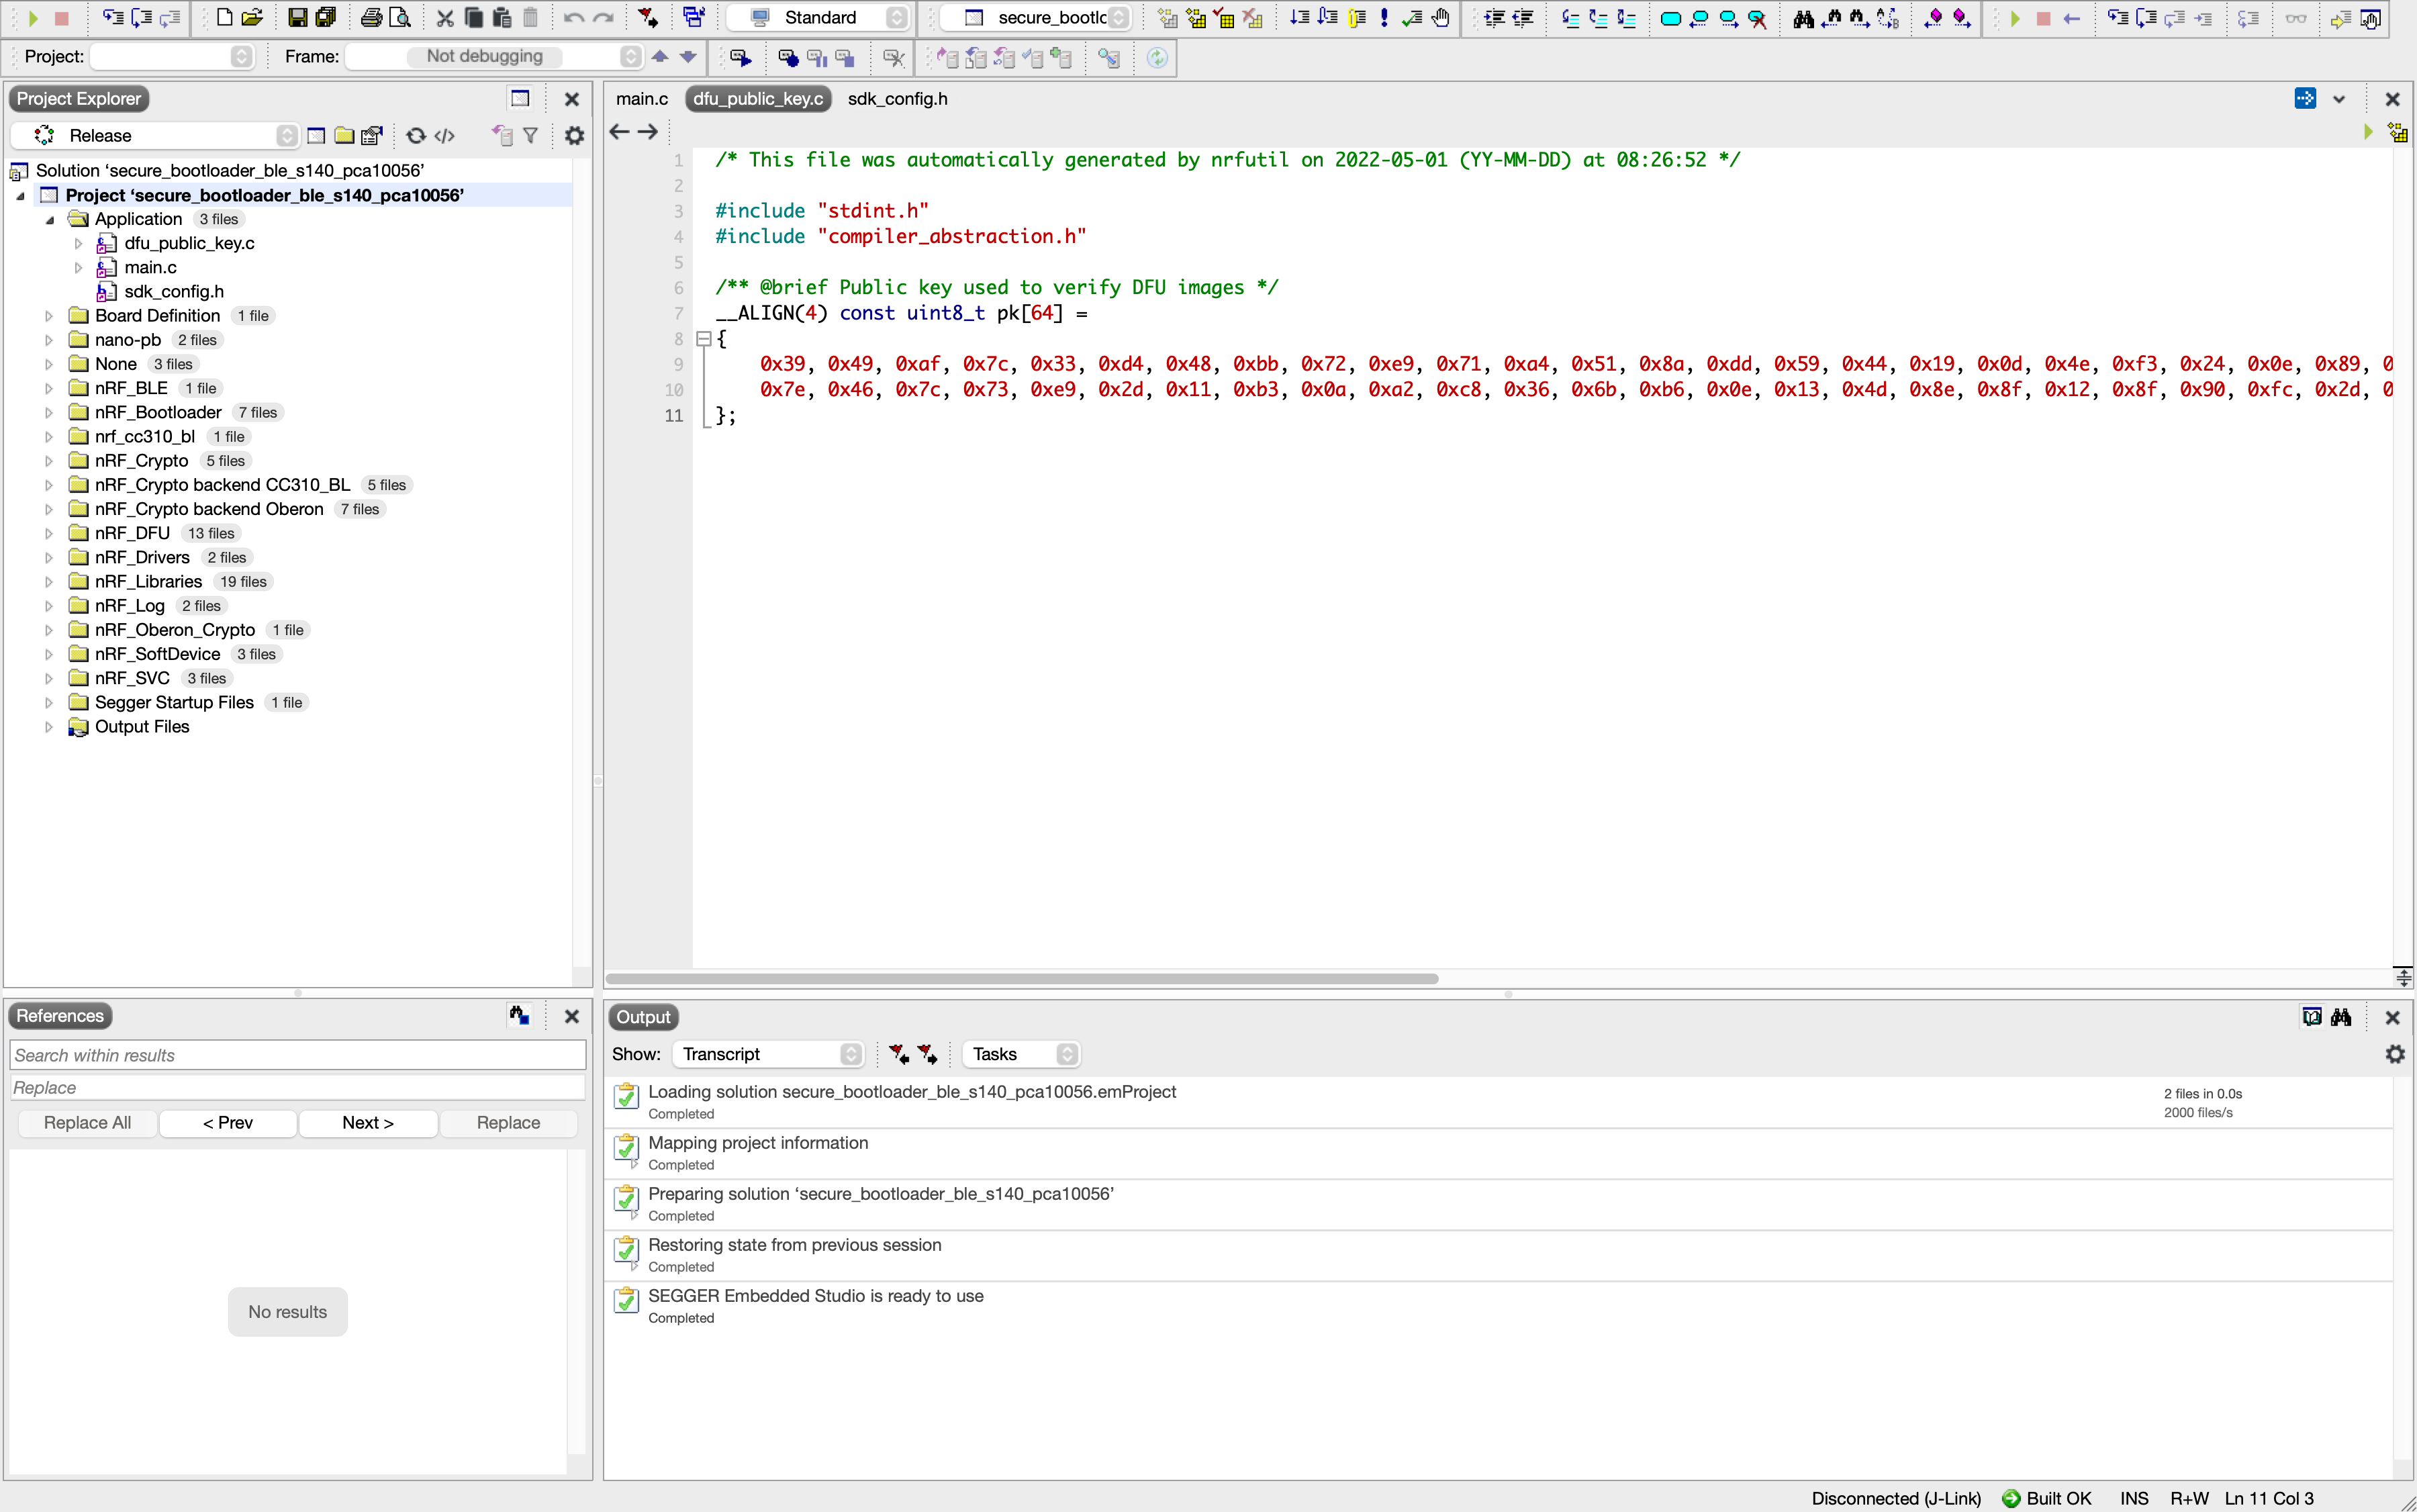
In the project, open the file dfu_public_key.c and replace its contents with the contents of the file we generated above, public_key.c.
Now, build the bootloader solution and copy the file located at <nRF5 SDK>/examples/dfu/secure_bootloader/pca10056_s140_ble/ses/Output/Release/Exe/secure_bootloader_ble_s140_pca10056.hex to the dfu folder we created.
Ok, that's it in terms of source code modifications!
3. Creating the firmware image for the application
Now, let's go through the steps needed to create our firmware hex image file:
1. Copy the build output hex file from the modified ble_app_blinky application to the above-created folder. The file should be located at <nRF5 SDK>/examples/ble_peripheral/ble_app_blinky/pca10056/s140/ses/Output/<Debug or Release>/Exe/ble_app_blinky_pca10056_s140.hex
2. Run the following command to generate a DFU Settings Page based on our application hex file
nrfutil settings generate --family NRF52840 --application ble_app_blinky_pca10056_s140.hex --application-version 1 --bootloader-version 1 --bl-settings-version 2 bl_settings.hexThe output should look something like this:
Note: Generating a DFU settings page with backup page included.
This is only required for bootloaders from nRF5 SDK 15.1 and newer.
If you want to skip backup page generation, use --no-backup option.

Generated Bootloader DFU settings .hex file and stored it in: bl_settings.hex

Bootloader DFU Settings:
* File:                     bl_settings.hex
* Family:                   NRF52840
* Start Address:            0x000FF000
* CRC:                      0xDA1BB4E9
* Settings Version:         0x00000002 (2)
* App Version:              0x00000001 (1)
* Bootloader Version:       0x00000001 (1)
* Bank Layout:              0x00000000
* Current Bank:             0x00000000
* Application Size:         0x0000DFC8 (57288 bytes)
* Application CRC:          0x342C1D00
* Bank0 Bank Code:          0x00000001
* Softdevice Size:          0x00000000 (0 bytes)
* Boot Validation CRC:      0x8C7C8FF7
* SD Boot Validation Type:  0x00000000 (0)
* App Boot Validation Type: 0x00000001 (1)
Now, let's merge the Bootloader Settings, the Bootloader itself, the Softdevice, and the application.
The Softdevice is located at <nRF5 SDK>/components/softdevice/s140/hex/s140_nrf52_7.2.0_softdevice.hex (your Softdevice version may differ).
The command to run for merging is:
mergehex --merge bl_settings.hex secure_bootloader_ble_s140_pca10056.hex s140_nrf52_7.2.0_softdevice.hex ble_app_blinky_pca10056_s140.hex --output bl_sd_settings_app.hexThe output will look something like this:
Parsing input files.
Merging file "bl_settings.hex" into output.
Merging file "secure_bootloader_ble_s140_pca10056.hex" into output.
Merging file "s140_nrf52_7.2.0_softdevice.hex" into output.
Merging file "ble_app_blinky_pca10056_s140.hex" into output.
Storing merged file.
4. Flashing the custom hex image to the development kit
The next and final step to run our application on the DK is to flash it.
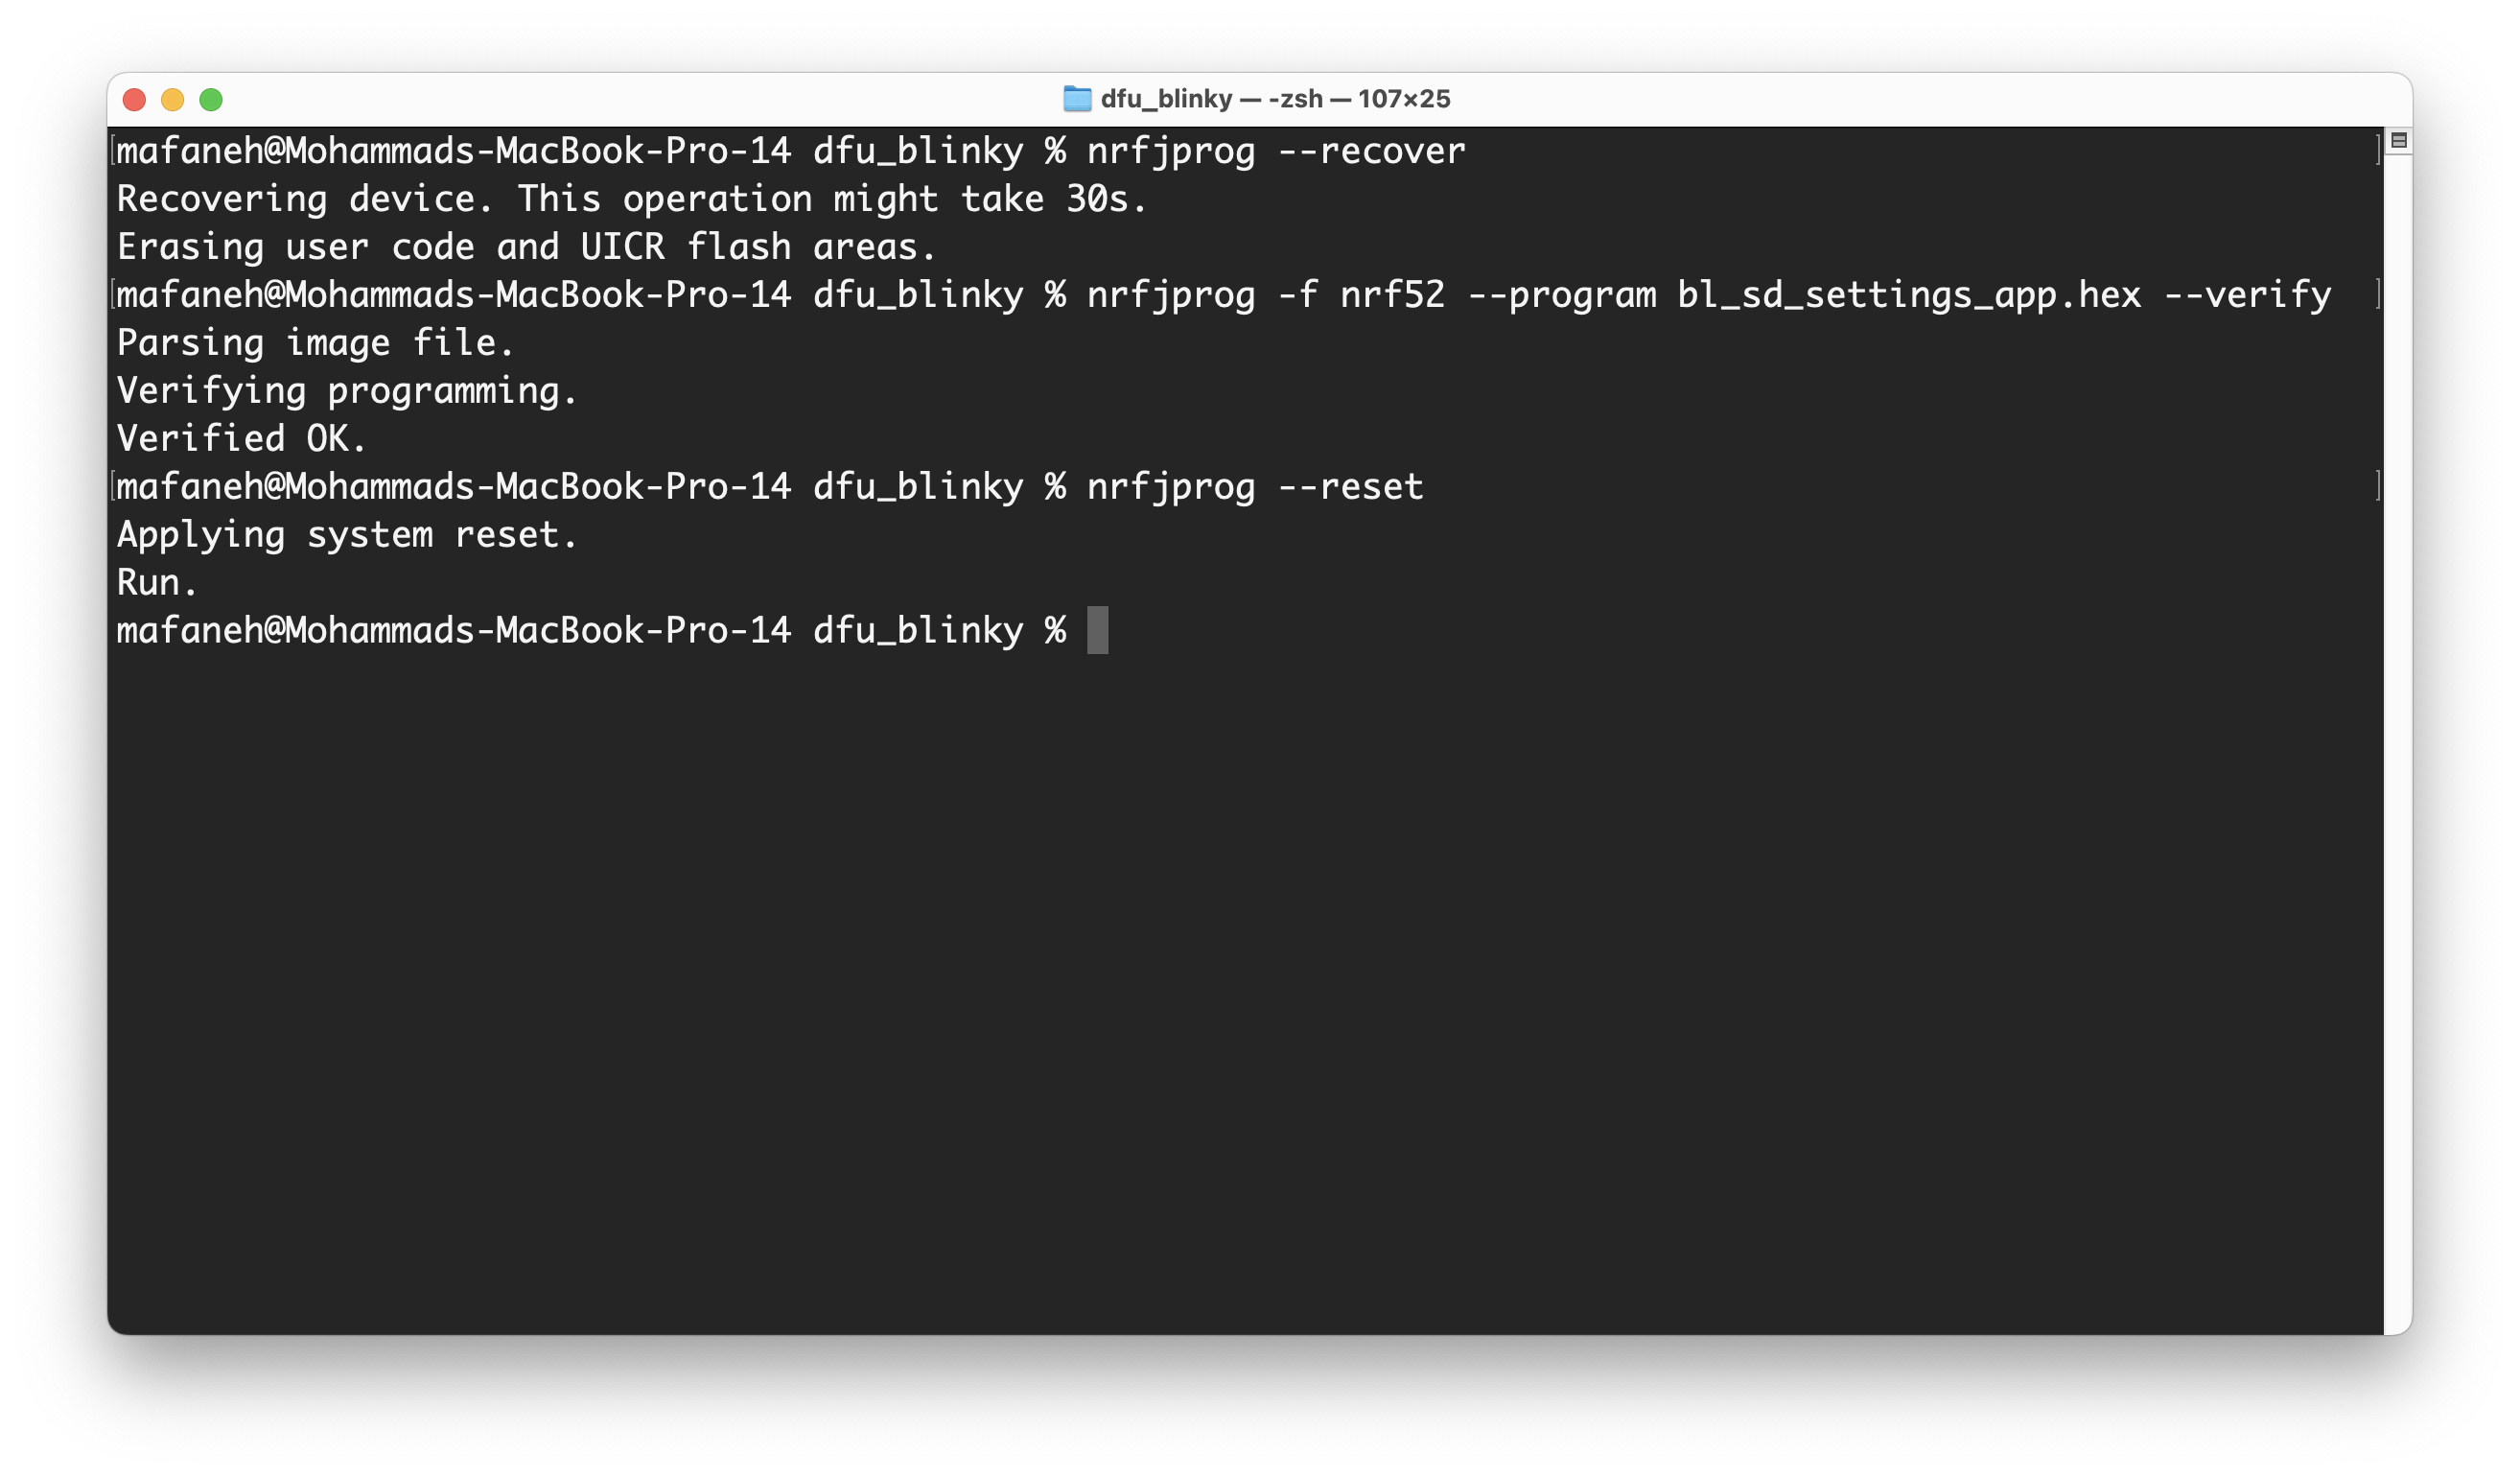
Run the following commands from the DFU folder that you created in Step 1.
nrfjprog --recover nrfjprog -f nrf52 --program bl_sd_settings_app.hex --verify nrfjprog --resetHere's the output from running the commands on my end:
Let's double-check that the application is running fine by connecting to the serial port. In my case, I'm using an app called Serial on macOS (other alternatives include PuTTY, minicom, etc.).
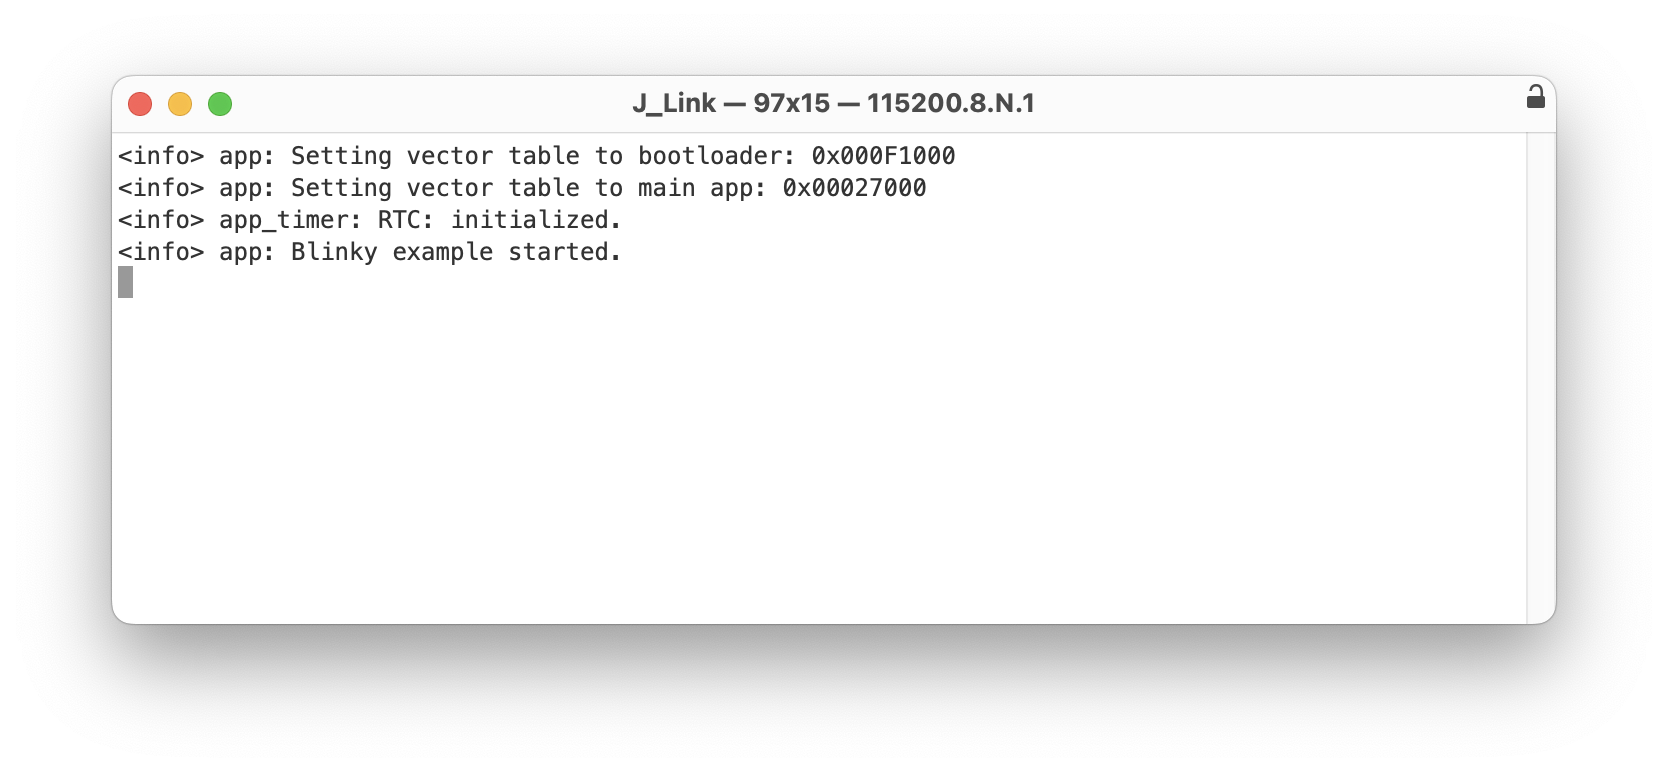
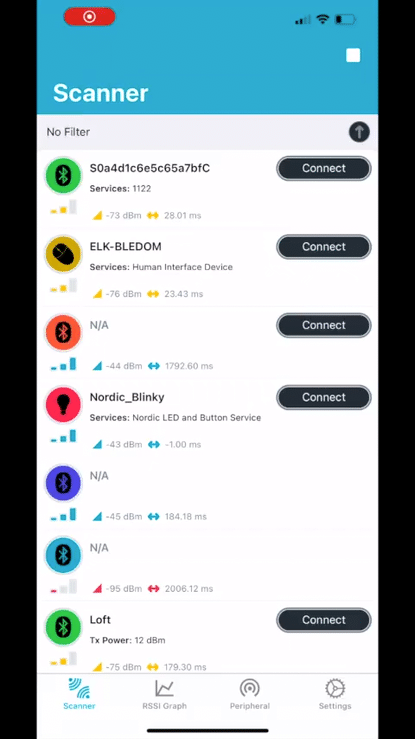
Now, if we run nRF Connect on mobile, you should see that the device is advertising with the name "Nordic_Blinky", and when you connect to it, you'll see that the "Secure DFU Service" and its characteristic "Buttonless DFU Without Bonds" are both present in the GATT server.
5. Building the DFU package
When upgrading the firmware on the device remotely (over BLE and using the bootloader), we need to provide a DFU package that's built specifically for this operation.
To generate the DFU package we need to use the nrfutil tool from Nordic (which we included as a software requirement at the beginning of the tutorial).
To ensure that the DFU package is secure, we will be creating a signed DFU package.
Before we do this, let's make one change to our application so we can verify that the update actually installed the new firmware.
Open the application solution again in SES (<nRF5 SDK>/examples/ble_peripheral/ble_app_blinky/pca11056/s140/ses/ble_app_blinky_pca10056_s140.emProject) and make the following change to the code (highlighted):
int main(void) {
    ret_code_t err_code;
    // Initialize. log_init();
    // Initialize the async SVCI interface to bootloader before any interrupts are enabled. err_code = ble_dfu_buttonless_async_svci_init();
    APP_ERROR_CHECK(err_code);
    leds_init();
    timers_init();
    buttons_init();
    power_management_init();
    ble_stack_init();
    gap_params_init();
    gatt_init();
    services_init();
    advertising_init();
    conn_params_init();
    // Start execution. NRF_LOG_INFO("Blinky example started. NEW VERSION!");
    advertising_start();
    // Enter main loop. for (;;) {
        idle_state_handle();
    }
}
Now, after the update we can monitor the serial output of the application and see that "Blinky example started. NEW VERSION!" is printed.
Build the application and copy the hex file (<nRF5 SDK>/examples/ble_peripheral/ble_app_blinky/pca10056/s140/ses/Output/<Debug or Release>/Exe/ble_app_blinky_pca10056_s140.hex) to the dfu folder we created.
Now, we're ready to build our DFU package including this modified application.
Note: in this example, I am including only the application hex file in the DFU package, but you can include a number of combinations. This is described in more detail here.
Here's the command you will use to generate the signed DFU package (from within the dfu folder you created):
nrfutil pkg generate --hw-version 52 --application-version 2 --application ble_app_blinky_pca10056_s140.hex --sd-req 0x0100 --sd-id 0x0100 --key-file private.key blinky_application_s140.zipLet's analyze the different arguments passed into the command:
--hw-version 52: this specifies that the package is built for the nRF52 family--application-version 2: if you look at the command we ran to create the Bootloader Settings page, you'll notice we supplied it with--application-version 1. By supplying the DFU package generation command with version 2 we are relaying to the bootloader that the application is a newer version than the existing application on the device, which in turn triggers the bootloader to allow the update. For more information on version validation (for hardware, softdevice, bootloader, and application), refer to the following documentation page.--application ble_app_blinky_pca10056_s140.hex: this provides the complete firmware image hex file to use for generating the DFU package.--sd-req 0x0100: this specifies the firmware IDs of the SoftDevices that are allowed to be updated from within the DFU package. Refer to the next argument described below to see how to determine the SoftDevice's firmware ID. Here were are telling the bootloader to only accept the same SoftDevice firmware ID. You can provide a comma-separated list instead if you want to allow multiple firmware IDs.--sd-id 0x0100: this corresponds to the firmware ID of the SoftDevice present on the target device. In the case of SoftDevice version 7.2.0 (which is what we used in our tutorial), the id is 0x0100. You can find the id that corresponds to the SoftDevice you are using by referring to the release notes for the specific SoftDevice version you're using in the SoftDevice package downloadable available here.--key-file private.key: this supplies the private key used for signing the firmware image. This gets validated in the device's bootloader using the public key that we compile/hard-code in the DFU bootloader image.
Finally, we are ready to use this DFU package (zip file) to upgrade the firmware on the target device. I'll be using nRF Connect on iOS for this:
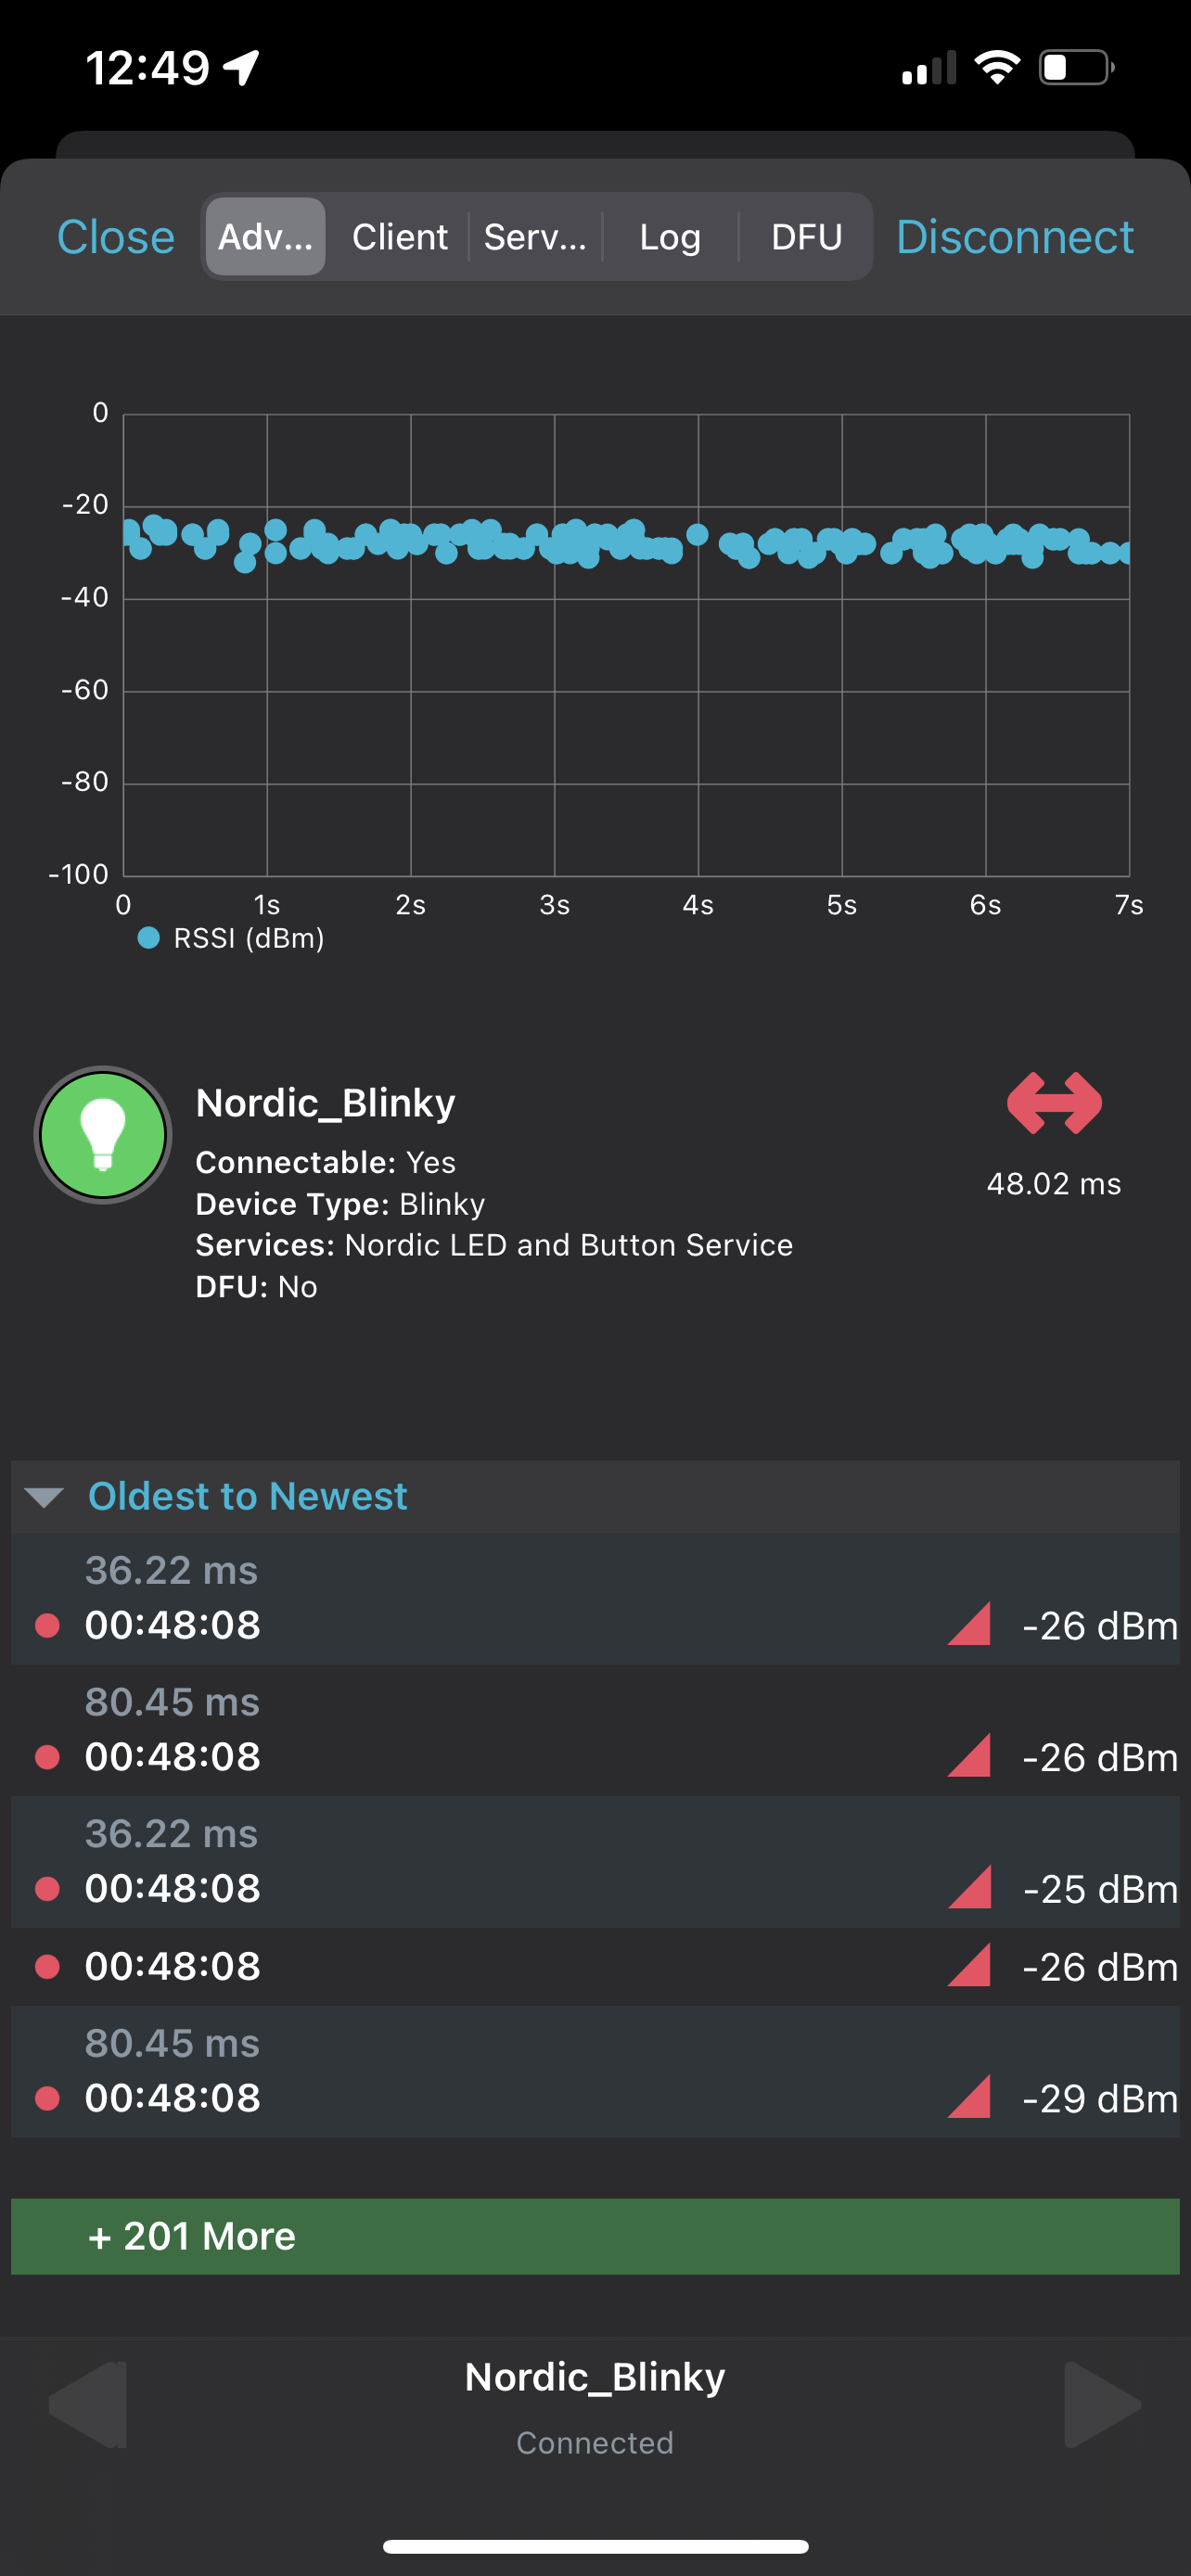
Open nRF Connect on iOS, then scan for the device and connect to it:
Then click on the DFU tab:
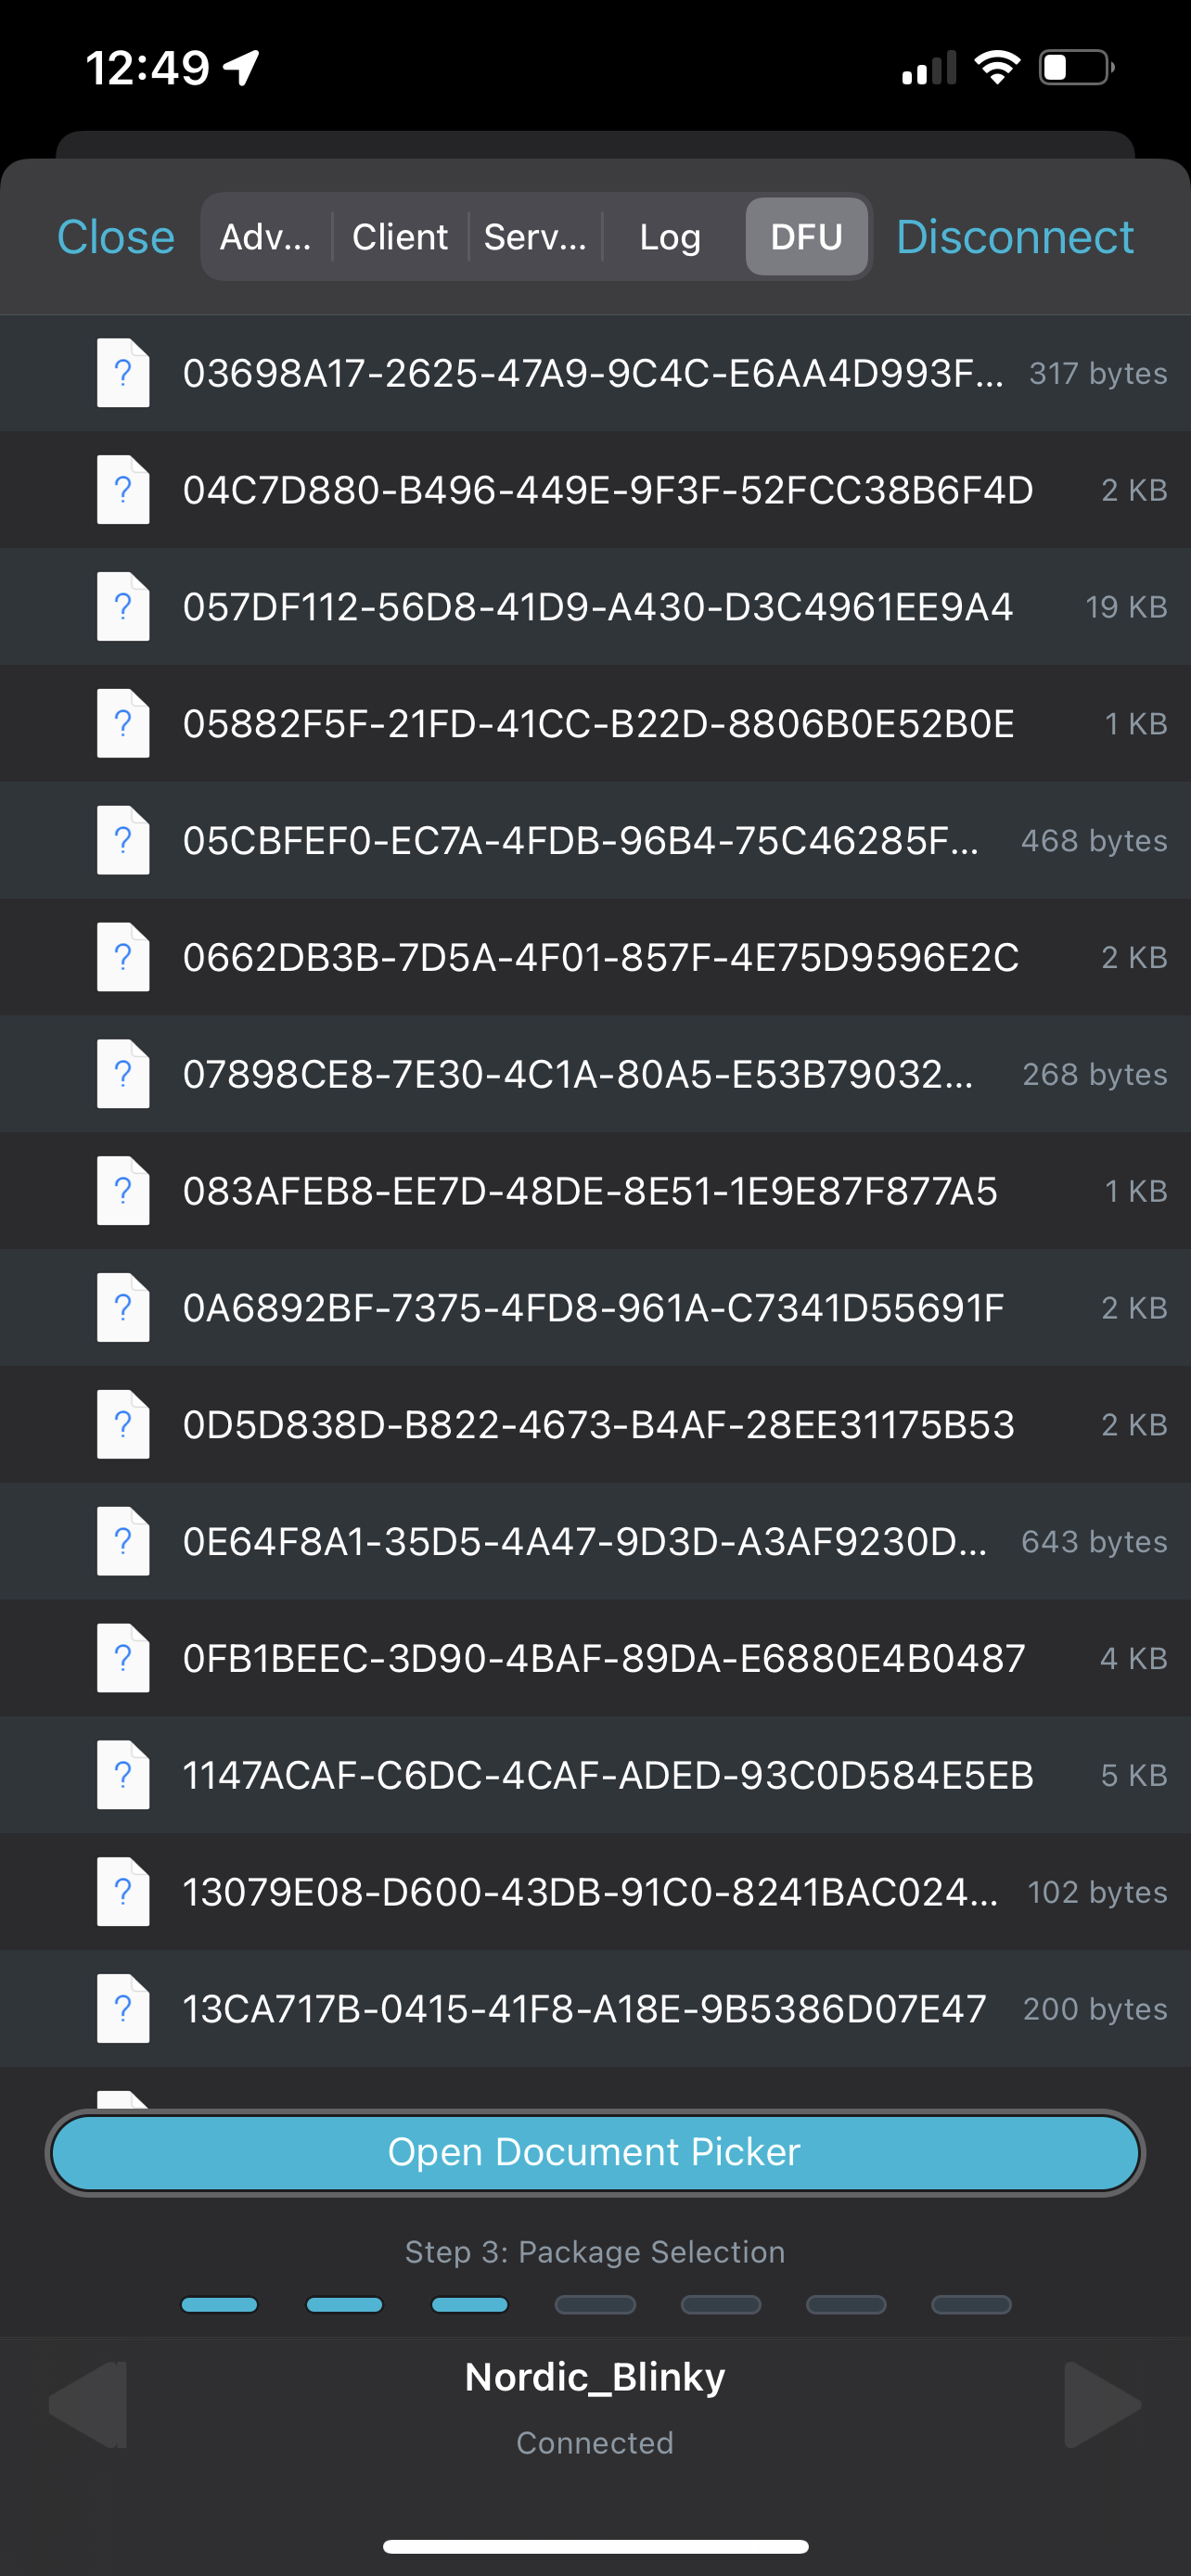
Finally, click on "Open Document Picker" to select the DFU package[zip] file we created.
You have to first transfer this file from your PC to the phone (on iOS, you can choose this file from a variety of sources including iCloud Drive, any other connected cloud drives such as OneDrive, or from a local folder on the phone).
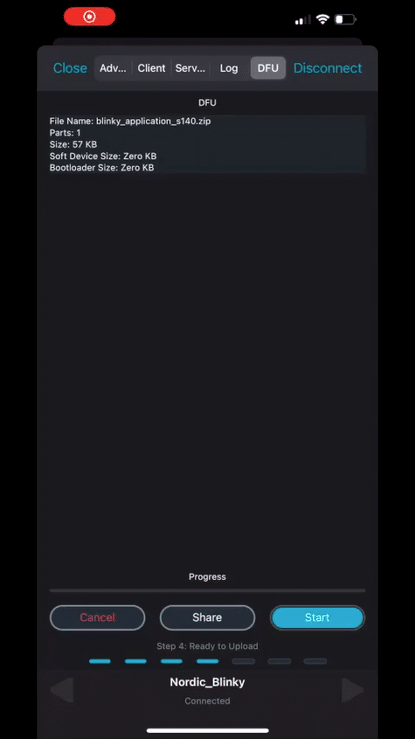
Once you've located the file, click on it and you'll be presented with the following view:
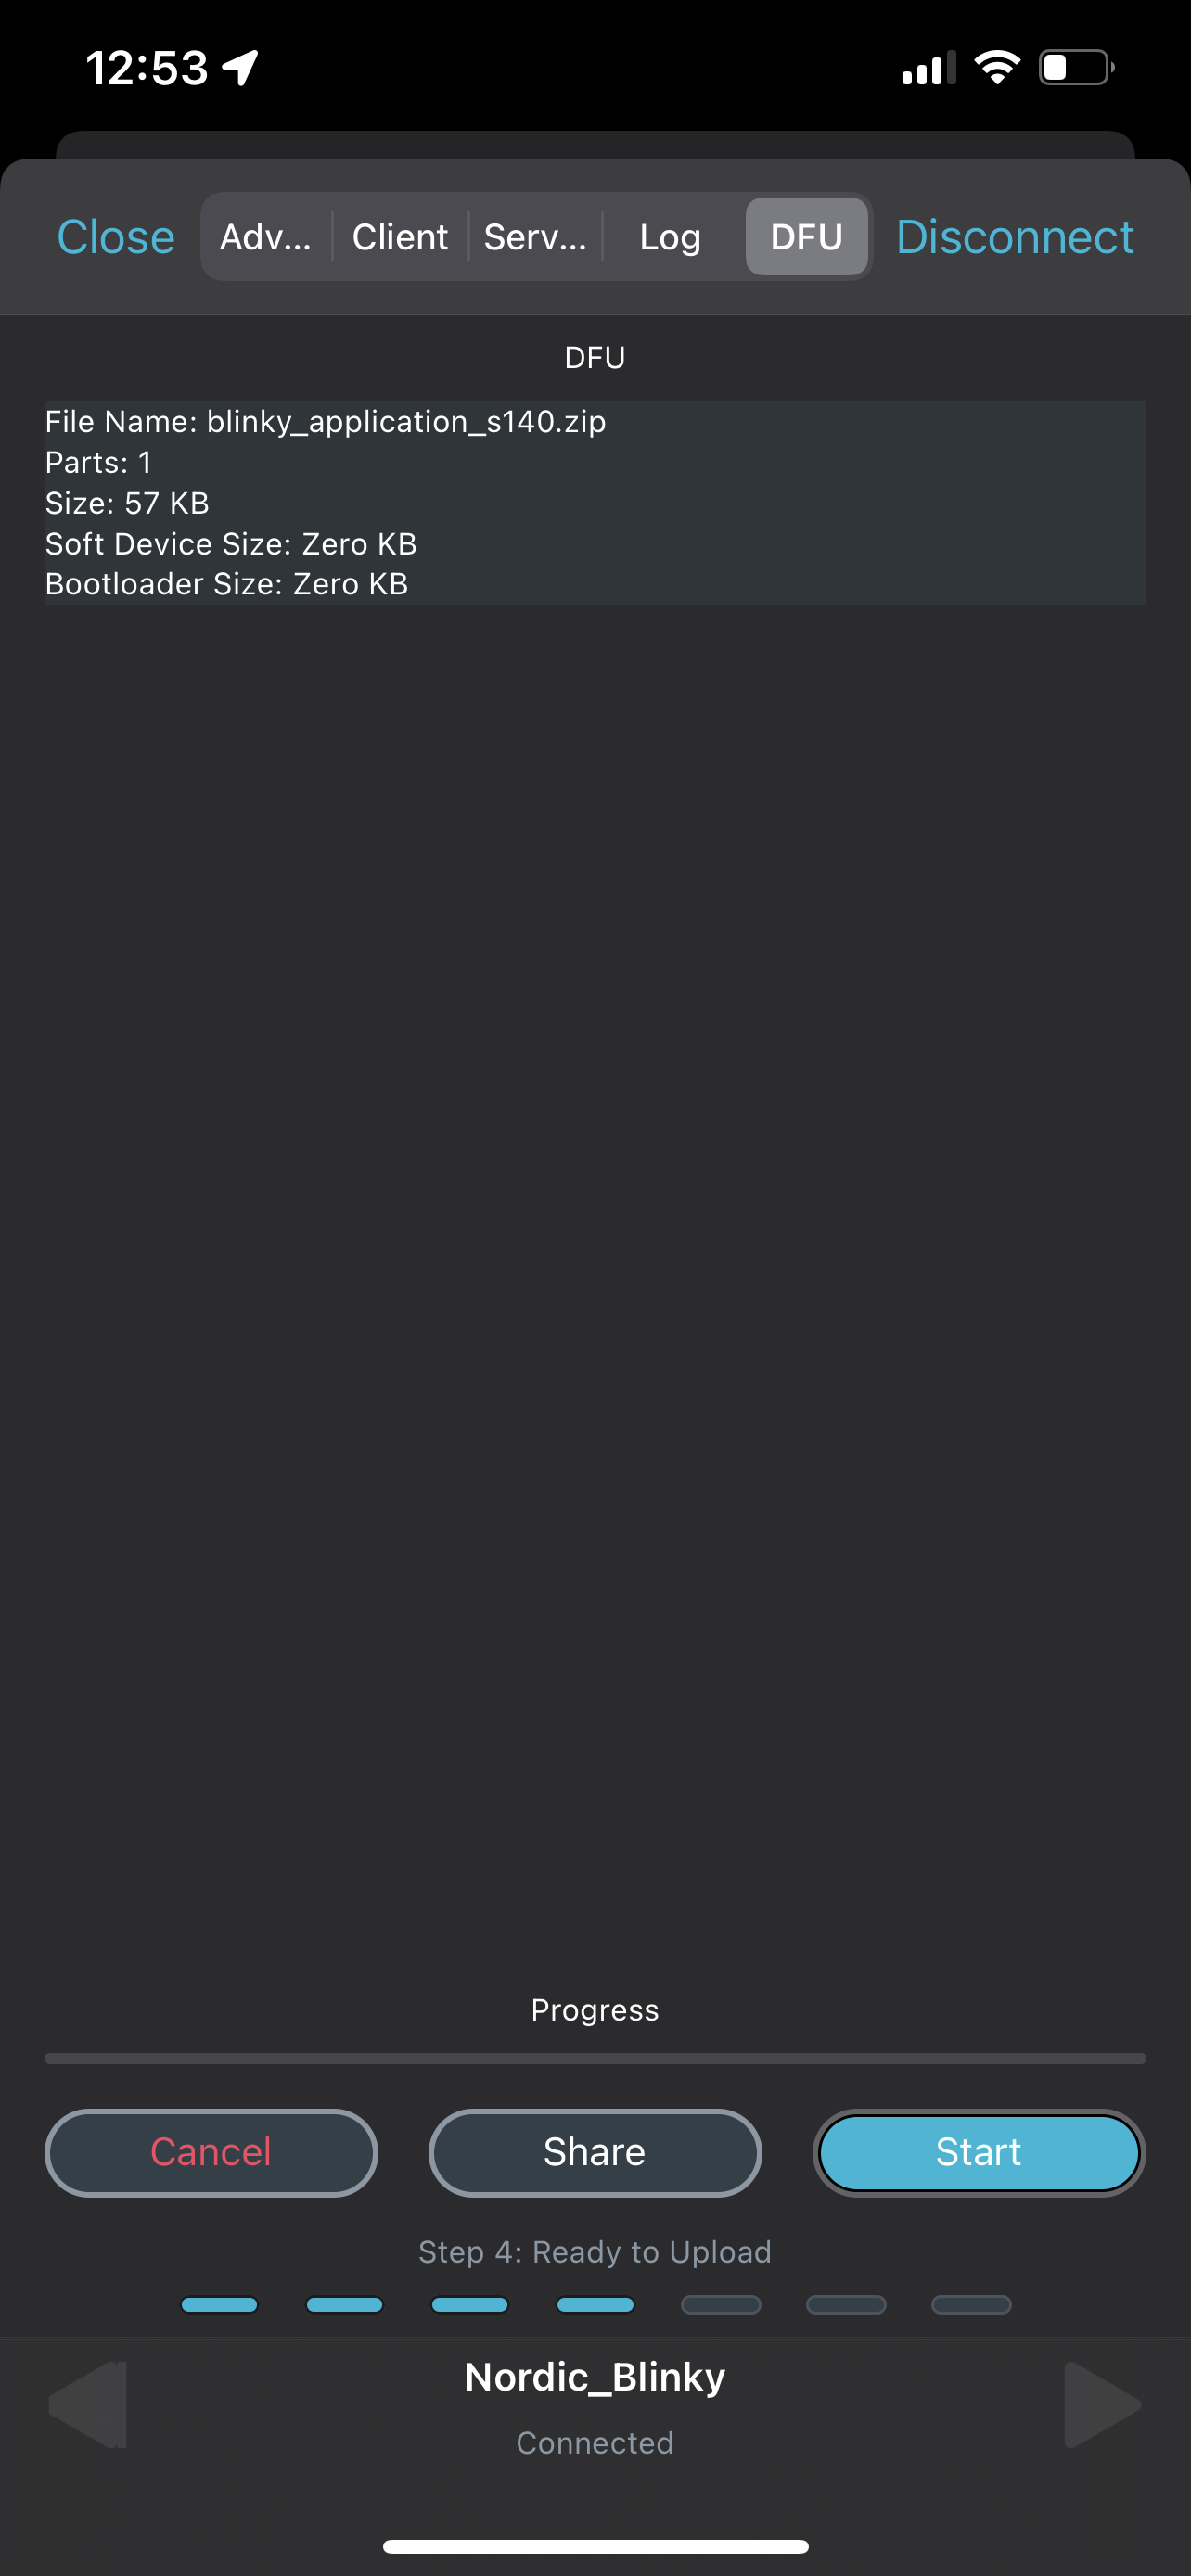
You'll notice that nRF Connect analyzed our DFU package and that it lists the contents of it, in our case just the application.
Ok, now we are ready to start the DFU process by clicking the Start button:
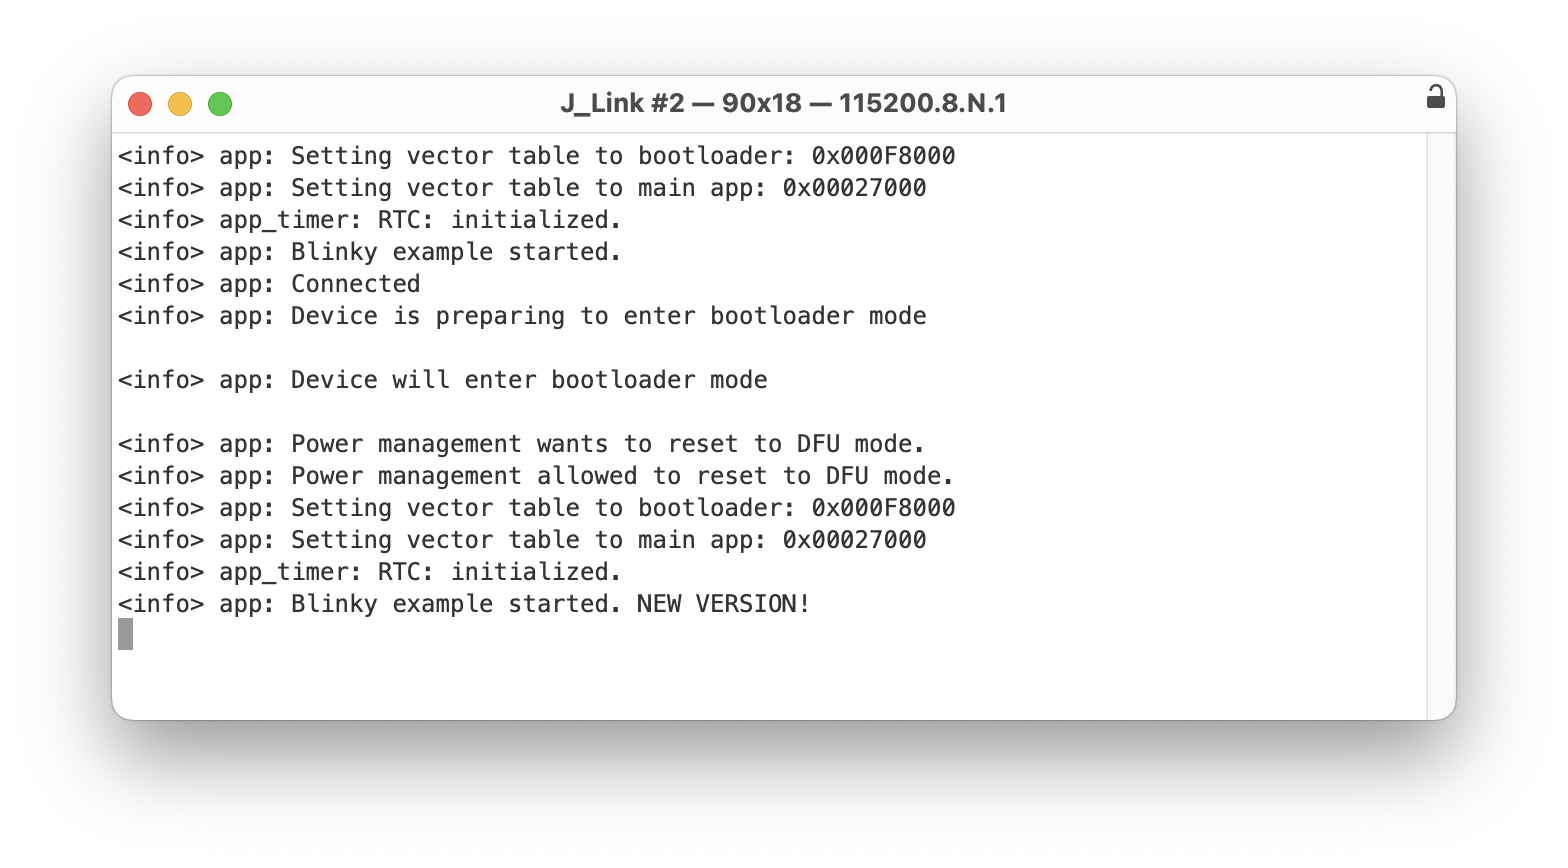
Head over to the serial port terminal connected to the device and you'll notice that our application now prints out the message: "Blinky example started. NEW VERSION!"
Woohoo! Firmware update successful!! 🎉🎉🎉
Summary
We covered a lot in this tutorial! But I hope you found it helpful.
We outlined all the necessary steps to:
- Integrate Buttonless DFU into our own application
- Generate a public-private key pair for a secure DFU process
- Integrate the generated public key into the bootloader
- Create a Bootloader + SoftDevice + application image file [hex]
- Flash the image to the development kit
- Verify that our custom application is behaving correctly (advertising, accepting connections, and that the GATT server includes both the original application Services and Characteristics in addition to the DFU service)
- Generate a signed DFU package that includes a new version of the application (with a modified print-out message)
- Utilize nRF Connect for mobile to connect to our device and perform the DFU process using the DFU package that we created


