

If you're interested in learning more about how to make use of Web Bluetooth, you're in the right spot. But before we get there, let's take a step back...
There is growing support for browser-based applications and operating systems. Web apps, as they are popularly known, are attractive since they can be run from any connected device, e.g., a laptop, a tablet, or a smartphone - without needing native apps for each. Until recently, web apps have been very limited, but with new tech stacks and browser features, they are touted as the future by some.
While progressive web apps have made significant feature gains, their ability to communicate with external hardware is extremely limited, if not non-existent. This is especially a major block to their adoption in an IoT world where lots of sensing and monitoring hardware are used. For Bluetooth, and Bluetooth LE specifically, being by far the most popular wireless communication protocol for IoT devices, it is important for applications to be able to interact with such devices.
Web Bluetooth Basics
Web Bluetooth is an attempt to work around this limitation and make it possible for progressive web apps to interact directly with Bluetooth-enabled hardware. Put simply, Web Bluetooth is a set of standardized APIs to enable browser-based interactions with BLE devices. This effectively allows web applications to be much more powerful and sometimes removes an additional layer of native application for Bluetooth hardware communication.
While the specs of Web Bluetooth aren’t officially finalized, Google has been a huge supporter of the project from the get-go and offered its partial support in Chrome browsers since 2016. As of now, amongst the major browsers, Web Bluetooth support is provided in Chrome, Edge, and Opera (Safari being a major browser that is missing from the list). With time, as the specs are finalized, I am convinced that all the browsers will support Web Bluetooth - both on PCs and mobiles - thus enabling highly interactive and seamless progressive web applications.
While the support is currently relatively limited, there is still a lot that can be done using Web Bluetooth. In this tutorial, we will be exploring the various methods provided by the Web Bluetooth API to demonstrate their capabilities. We will also look at the current limitations and possible ways of working around them. Specifically, we will be looking at the following:
- Scanning for Bluetooth Low Energy peripheral devices
- Setting scan filters to find specific remote devices
- Connecting to a Bluetooth LE device
- Reading device information
- Disconnecting from a Bluetooth LE device
- Reading a BLE characteristic
We will begin by discussing the situational context and work towards creating the scaffolding of a simple web app and creating its views. We will then add communication capability to this web app by using the Web Bluetooth APIs in order to receive and display data from BLE sensors.
Getting Started with an Example Web Bluetooth Project
For the purpose of this tutorial, we will imagine a scenario where multiple athletes are in a practice session, and their health status needs to be monitored remotely. This is to be done by receiving their heart rate and also checking the battery status of the sensors they are wearing. The coaches can type in the name of the athlete they want to monitor, and the app should be able to connect to their sensor and start receiving and displaying the data.
Prerequisites
- Any computer or tablet with a text editor and supported browser.
- 1 x BLE Peripheral
(we have used 1x nRF52 Development Kit with Nordic HRS example). - Basic understanding of HTML, CSS, and JavaScript.
Note: we will be using Bootstrap 5 to develop the user interface, which hugely simplifies the process of adding and aligning various UI components.
For this project, I am using:
- MacBook Pro 2017 with macOS Big Sur (11.4)
- nRF52 Development Kit with Nordic HRS peripheral example
- Google Chrome (Version 103.0.5060.53)
- Atom (as text editor)
App Requirements and Prototyping
The first thing we need to do is to figure out the look and feel of our HR monitoring web app based on its functional requirements as well as the features we want it to have. The main requirements are listed as follows.
- A single-page web app with all the information easily visible.
- Ability to enter the name of the device to connect with.
- A button to initiate connection or disconnection.
- Informational text displaying the connection status of the device.
- Show heart rate values in real-time.
- Display battery status.
Based on these requirements, a simple user interface would look like the sketch below.

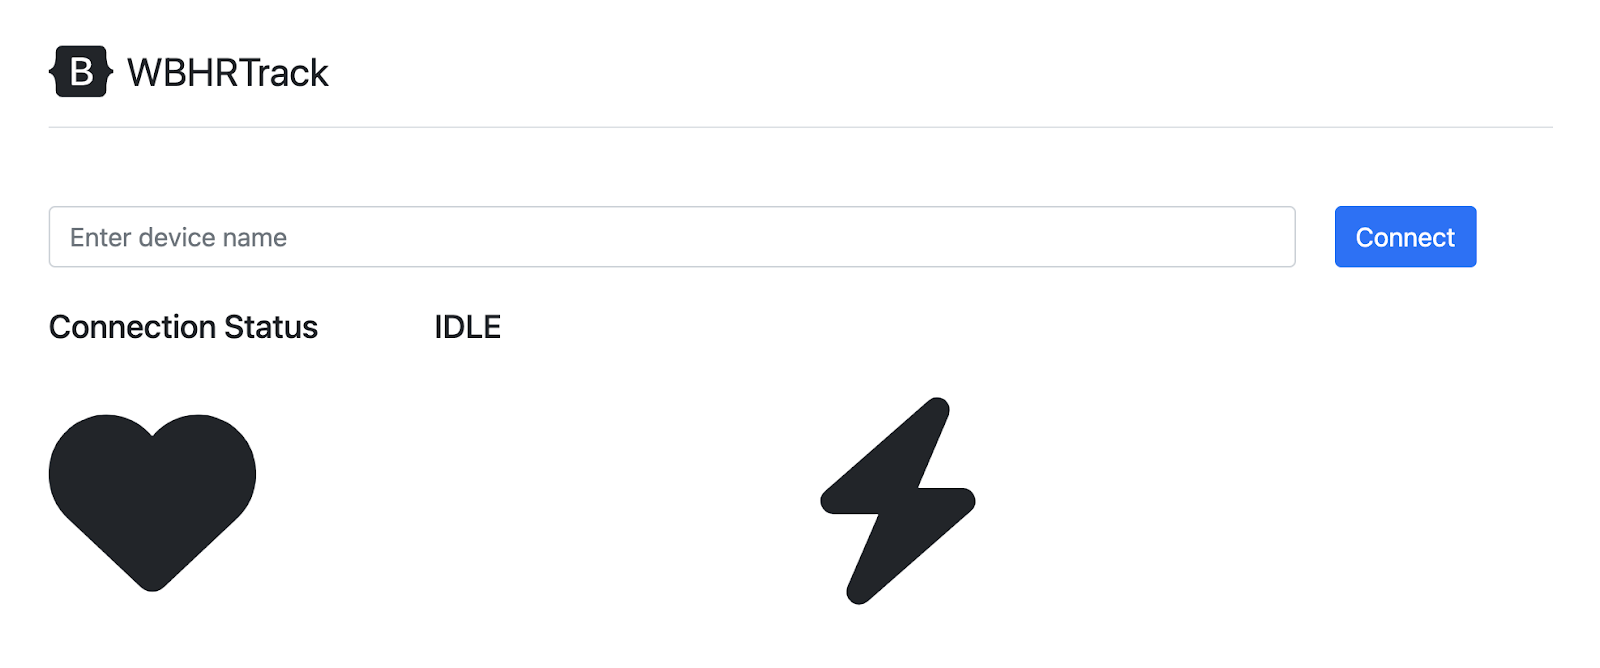
The end result of what we are designing today will look like the following image below.
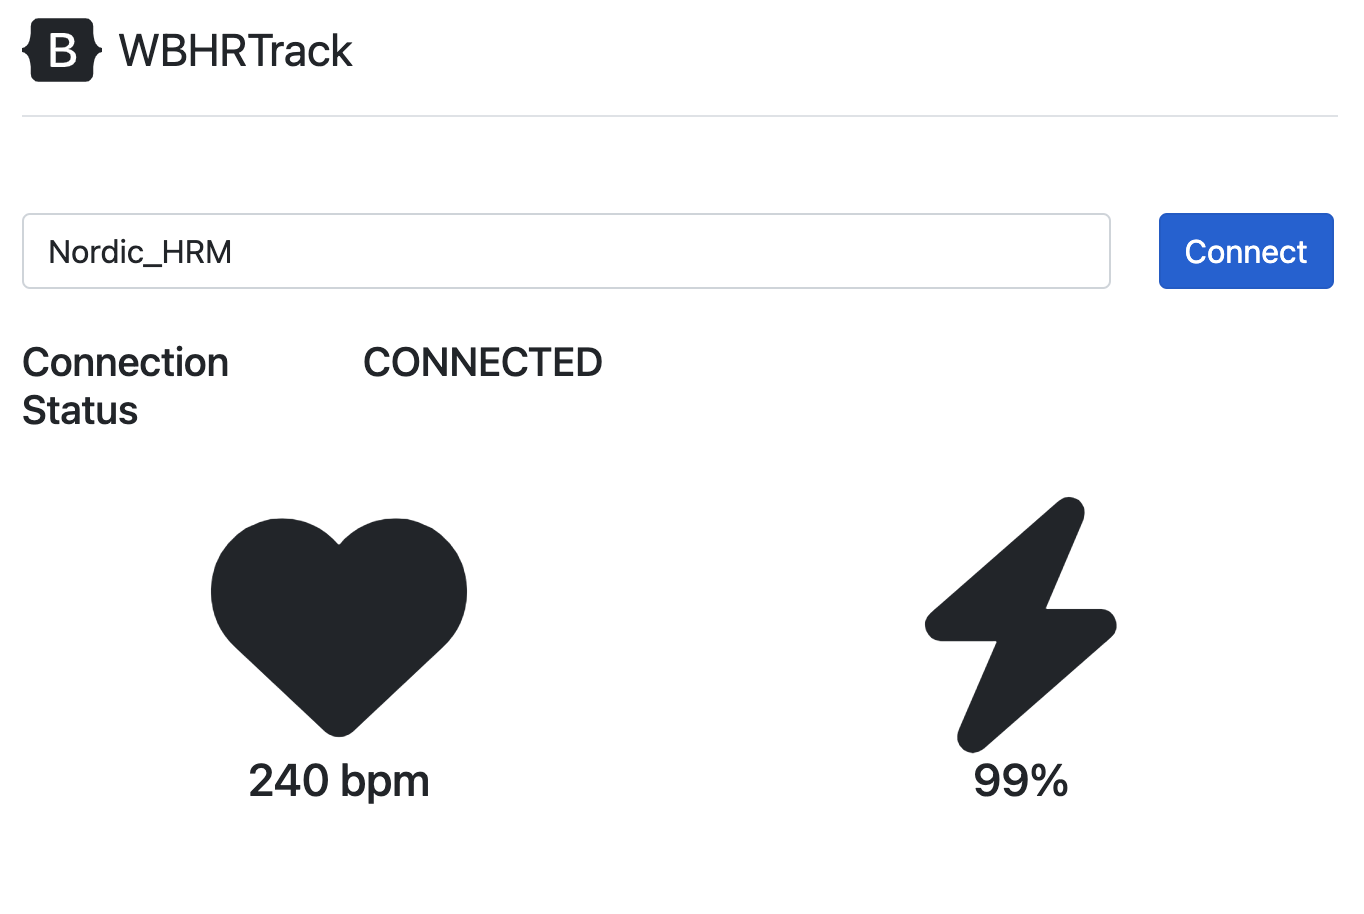
In the next section, we will start putting together all the components needed to make our user interface look like the image above.
UI Development
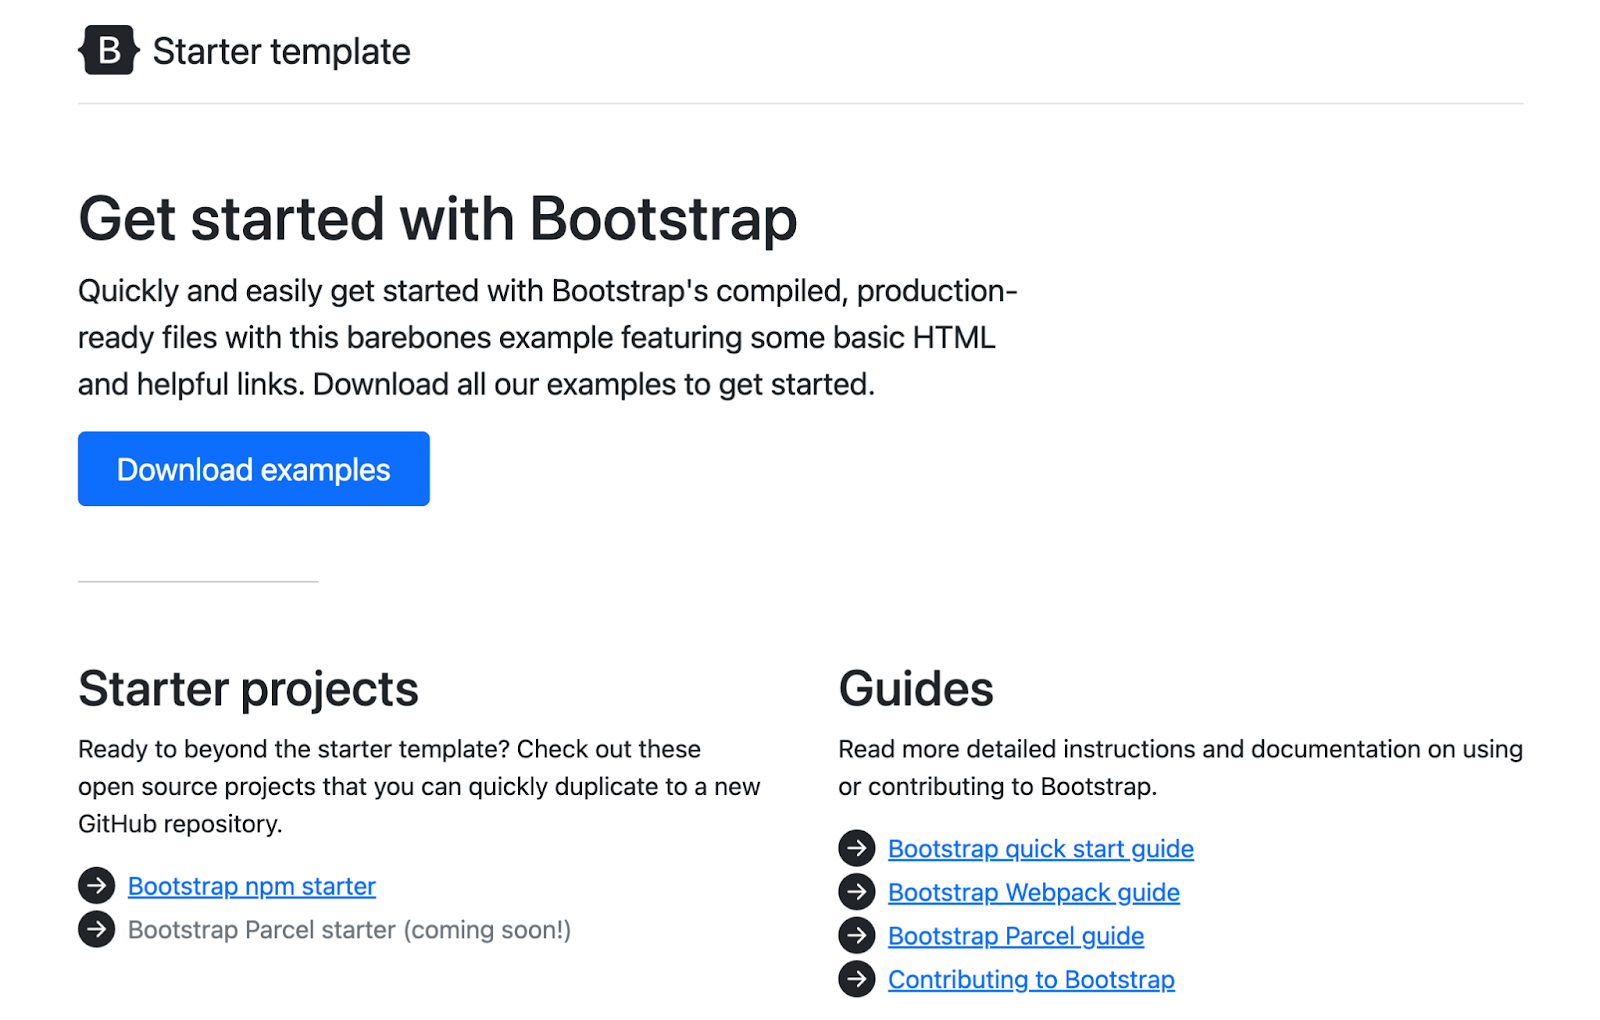
Since we are using the Bootstrap framework for our UI Development, the first task is to set it up. The easiest way is to download the Bootstrap examples compressed file. Once downloaded, unzip it and find the example named starter-template. This contains the files that we will copy over to our project folder shortly.
Create a new folder for our project. I am calling it WBHRTrack (which is short for Web Bluetooth HR Track).
Inside the folder, create a subfolder called app and copy over the starter template’s HTML and CSS files inside this.
At the top level of the WBHRTrack folder, copy over the assets subfolder from the downloaded examples folder.
The folder structure should look as shown below.
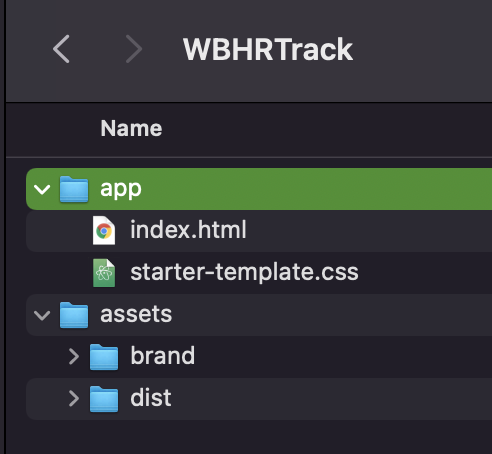
To test that everything works so far, open the index.html file in your browser, and you should see the following page.
If you see any formatting issues at this point, make sure your folder structure is correct since we are referring to the assets folder from the index.html file.
So far, we haven’t made any changes to the code, but since we want our app to look very different from what is shown in the template, we will now edit the index.html file to suit our requirements.
The first thing you might want to change is line 7 so that you are the author of this page. Change the value of the content field to your own name. Next, change the title of the web page on line 9 to something more useful. This is the text between the <title> and </title> tags. I have changed it to Web Bluetooth HR Track, so the updated line 9 is as follows:
<title>Web Bluetooth HR Track</title>Next, we want to change the top header text (we can leave the Bootstrap logo for now). Change this on line 44 (inside the header tag) to be the following.
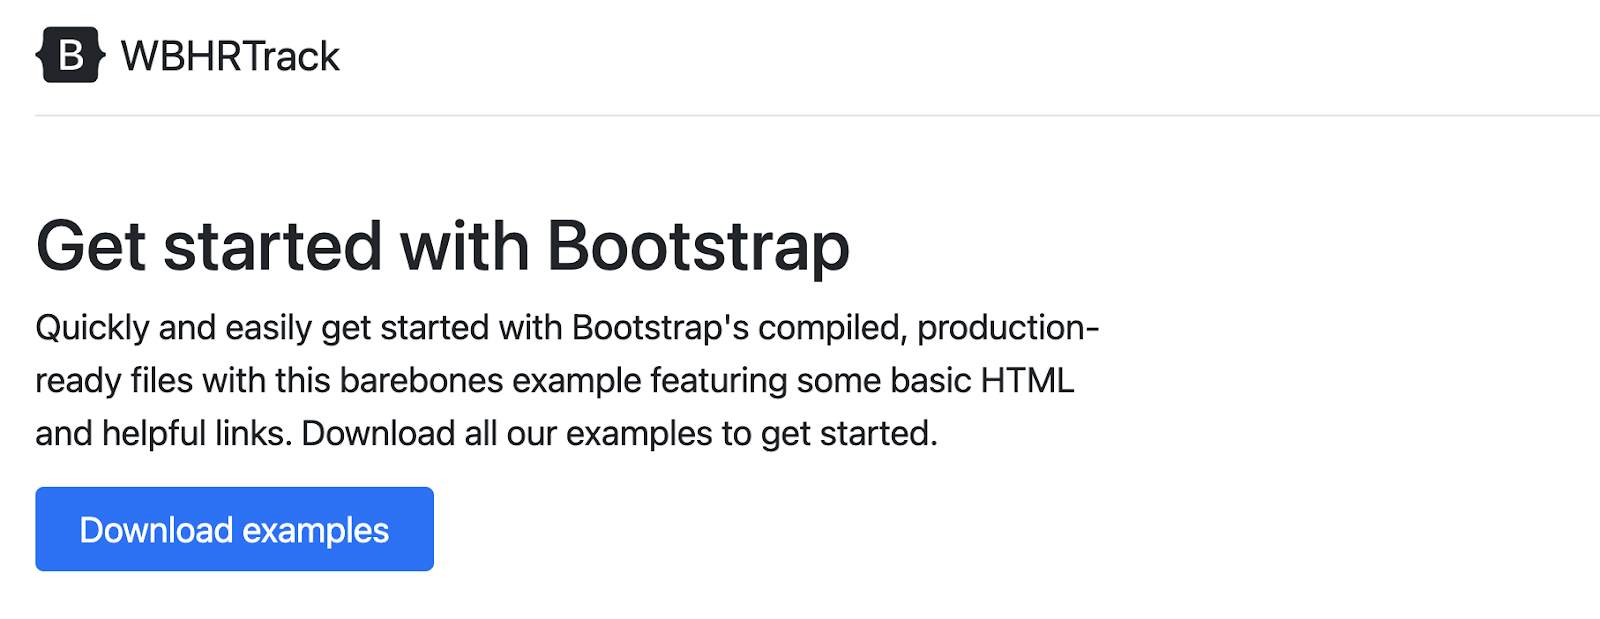
<span class="fs-4">WBHRTrack</span>Refresh your page, and you should see the following. Our title is right on top in the header. We can leave the Bootstrap logo as it is for now.
Next, we can remove the rest of the page's content since we don’t need any of that.
We can remove everything between the <main> and </main> tags and fill it up later with our content.
Now we can start adding the UI elements to make our web page look like the prototype we created in the previous section.
The first thing we want is a form or text box to enter the name of our nearby device, followed by a button to connect to that device.
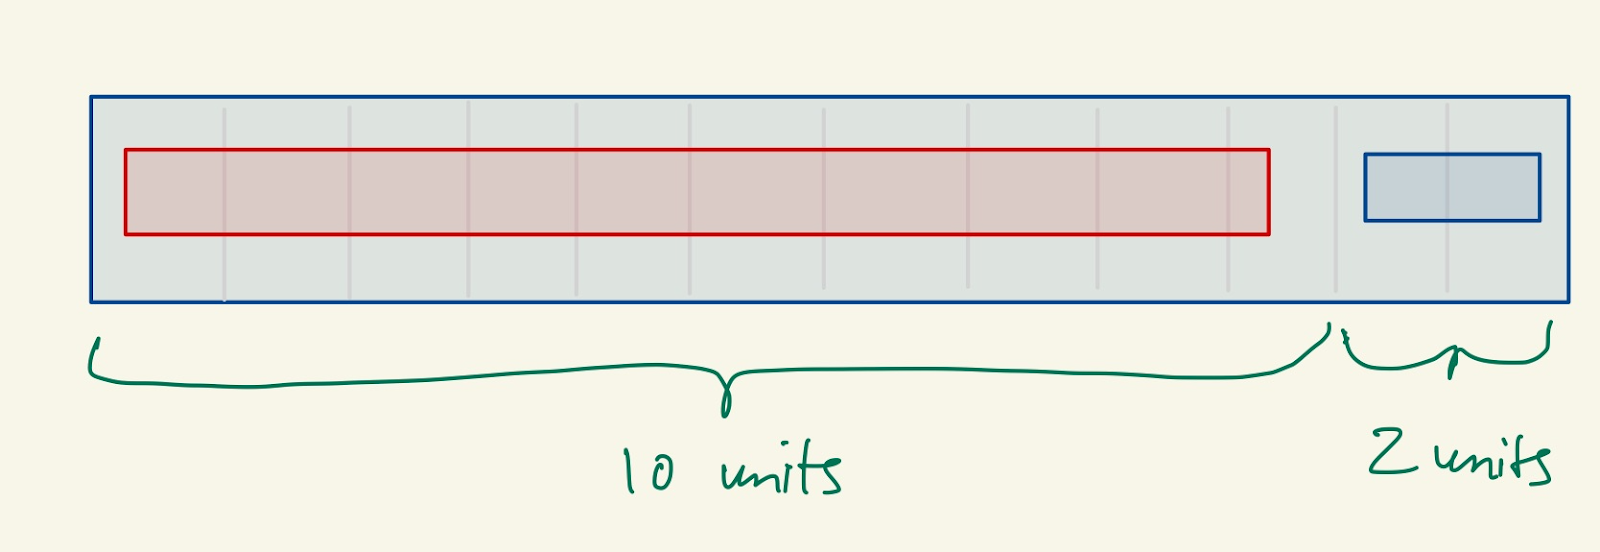
Bootstrap follows a grid system where we add things in rows and columns. For example, if we want to add a form, we will do so in a new row. We want the form to take 10 units (out of 12) of column space and 2 units taken by the button. This is illustrated in the figure below.
Within the <main> element, we add a new row:
<div class="row"> </div>Within the row element, we add a column with class col-10 (spanning 10 units) and add our form inside it. We have given it the id deviceNameInput so that we can easily identify it later from our script.
<div class="col-10">
  <input class="form-control" id="deviceNameInput" placeholder="Enter device name"> </div>
On the same row (so part of the same row tag), we add another column with class col-2 that will hold our control button. Bootstrap has different button styles, of which we are using the primary button style with the class name btn-primary. The button id is controlButton (but it can be whatever you want as long as you can identify it later). The column can be added with the code below.
<div class="col-2">
  <button type="button" id="controlButton" class="btn btn-primary">Connect</button>
</div>
This completes our first row. The complete code for the row is as follows.
<div class="row"> <div class="col-10"> <input class="form-control" id="deviceNameInput" placeholder="Enter device name"> </div> <div class="col-2"> <button type="button" id="controlButton" class="btn btn-primary">Connect</button> </div> </div>If you save the source file and refresh your browser, you should see the form and button as below.

Next, we will add our connection status label, which will be on a new row. In this row, we would like the first 3 column units to hold the static text “Connection Status” and the other 9 units for dynamic text indicating the status of the peripheral connection.
We will do this with a div unit of class row inside which there will be two other div units of class col-3 and col-9, respectively.
<div class="row"> <div class="col-3"> <h5>Connection Status</h5> </div> <div class="col-9"> <h5 id="connectionStatus">IDLE</h5> </div> </div>Note that we are using h5 heading tags for the text. For the second h5 element, we have given it the id connectionStatus and default value of IDLE. When the status changes, we will use this id to update the label. Save and refresh, and you should see this appear on your web page.

As you can see, the label is very close to the form element, so we need a bit of spacing between the two. To add spacing, we add gy-4 class to both columns (gy-* is used to add vertical gutter, and gx-* can be used to add horizontal gutters). This would be done as follows.
<div class="col-3 gy-4"> ... </div>And the resultant change is shown in the image below.

Finally, we need to add the last row, which has large icons and text for the heart rate and battery charge. We can add these icons as images, but I will use the amazing resource of icons that is Font Awesome. Once set up, we can simply add any icon we like by referring to its class name (found on Font Awesome’s website).
Setting up Font Awesome is super easy. Go to its Start page, enter your email to register, and receive a unique code. Once you have the code, enter the following script tag with your code just before the end of your head element, i.e., before the line that says </head>.
<script src="https://kit.fontawesome.com/your-code.js" crossorigin="anonymous"></script>Make sure you replace your-code with your actual code in the line above.
Start a new row, and add two columns of 6 units, each keeping the vertical gutter spacing as gy-4 again.
<div class="row"> <div class="col-6 gy-4"> </div> <div class="col-6 gy-4"> </div> </div>We will now add the icons inside each col-6 div above. To add a heart icon, search for heart on Font Awesome’s online catalog of icons.
Select the filled heart icon and copy its HTML code from the snippet shown once you click it. Add this snippet to the first col-6 div element.
<div class="col-6 gy-4">
  <i class="fa-solid fa-heart"></i>
</div>
Next, search for battery or charge and find one of the icons to use for the second column. I have used the bolt icon, which is free to use. Add it to the second col-6 div element.
<div class="col-6 gy-4">
  <i class="fa-solid fa-bolt"></i>
</div>
Save and refresh your HTML file and you should see icons appear on the next row.

These are quite small, so we need to increase their size. With font awesome, we can increase the size easily by adding the relevant class name to the i tag. For example, to increase the heart icon size by 8x, we simply add the fa-8x class.
<i class="fa-solid fa-heart fa-8x"></i>Add the fa-8x class to both the icons and you should see the size increasing as below.
Next, we want to add the label showing the heart rate and battery charge values underneath the icons. We will do this by adding h4 tags with a unique id for each just below the icons. For the heart rate values, we add the following just below the heart icon.
<h4 id="heartRate">60 bpm</h4>Similarly, for battery percentage, we add the following just below the bolt icon.
<h4 id="batteryCharge">100%</h4>We also want our text to be centered inside the column, so we add a text-center class to both columns. The complete code for this row is as below.
<div class="row"> <div class="col-6 gy-4 text-center"> <i class="fa-solid fa-heart fa-8x"></i> <h4 id="heartRate">60 bpm</h4> </div> <div class="col-6 gy-4 text-center"> <i class="fa-solid fa-bolt fa-8x"></i> <h4 id="batteryCharge">100%</h4> </div> </div>And the resulting UI is shown in the image below.

Now that our UI is complete, we can move on to setting up Web Bluetooth to receive data from our sensor and update this interface.
(Note: We can add colors and stylise the look and feel by modifying the CSS but that is not in scope for this tutorial)
Initial Web Bluetooth Setup
Create an empty new JavaScript file adding it to the app folder. I have named it WBscript.js. Add this js file as the script source in the HTML file just before the end of the body section, on the line before </body>.
<script src="WBscript.js"></script>In this JavaScript file, we will get hold of our UI elements like the control button, form, and status label so that we are able to dynamically update or interact with them.
We will do this by defining three global constants that will get the element from HTML by using its id. This is done as follows in the JavaScript file.
const controlButton = document.getElementById("controlButton");
const deviceNameInput = document.getElementById("deviceNameInput");
const connectionStatus = document.getElementById("connectionStatus");
Now that we have a reference to our UI elements, the first thing we would want to do is to make our control button interactive. We will add an event listener to listen for the click events and then perform asynchronous tasks inside this.
Add the following to your JavsScript file after the const definitions.
controlButton.addEventListener("click", BLEManager);Here BLEManager() is an asynchronous function that we now define as follows.
async function BLEManager() {
}
Inside this function, we will use the Web Bluetooth API with await operator (which can only be used in an async function). This way, we will be running an async function with a series of statements waiting for one to complete before the other without blocking the execution of any other function of the web app.
Scanning for a BLE Sensor
Scanning for a BLE peripheral is performed using the navigator.bluetooth.requestDevice() method for which various options can be defined to filter the device that we are looking for. There are so many different options we can use as our filter criteria, whether it's based on services being exposed by the peripheral, manufacturer data, peripheral name, peripheral name prefix, optional services, etc. Alternatively, a simpler way is to not have any filter and scan for all BLE peripherals in the vicinity.
In the BLEManager() function (which is currently empty), add the following code.
const device = await navigator.bluetooth.requestDevice();Refresh your web page in the browser and click on the Connect button - without entering any text since we aren’t using that for now. We are only trying to see the BLE peripherals around us. What happens?
Nothing.
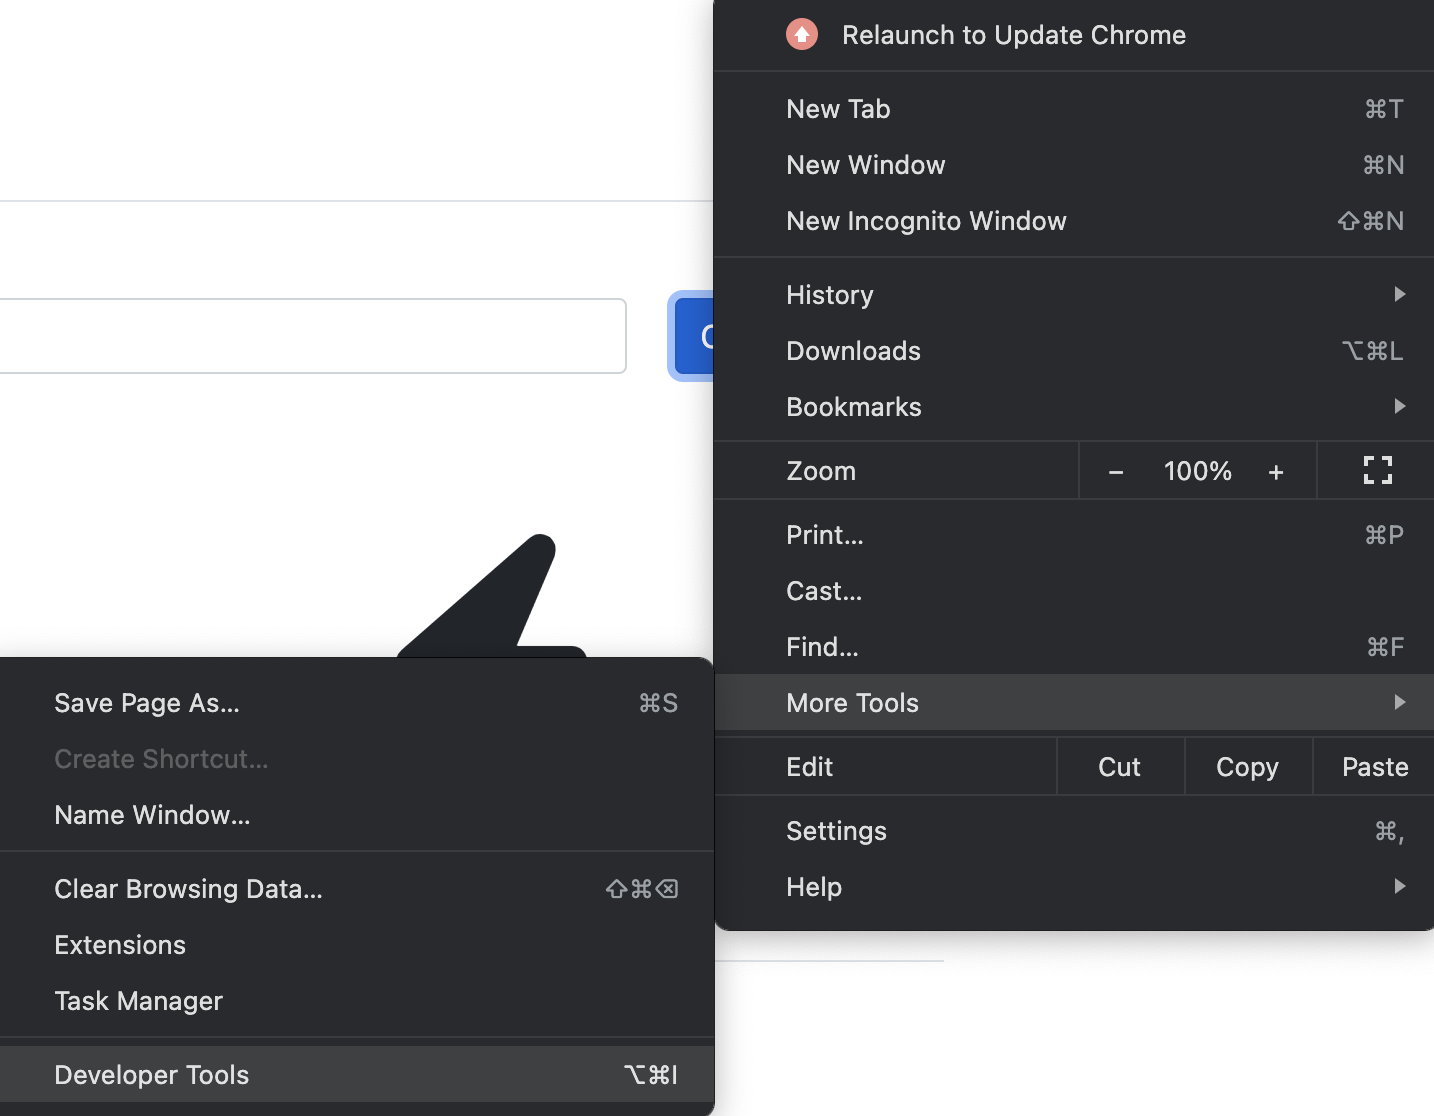
We need to debug what’s happening. Open your developer console. In Chrome, this can be done by going to Settings->More Tools->Developer Tools, as shown below.
In the developer console, you will see an error explaining what went wrong.

In order to scan for all devices, we need to set a certain acceptAllDevices option to be true, which is false by default.
Let’s add that to our requestDevice() function.
const device = await navigator.bluetooth.requestDevice({ acceptAllDevices:true
});
Save the script and refresh your browser tab, and press the Connect button.
If System Bluetooth is off on your device, you will get the following.
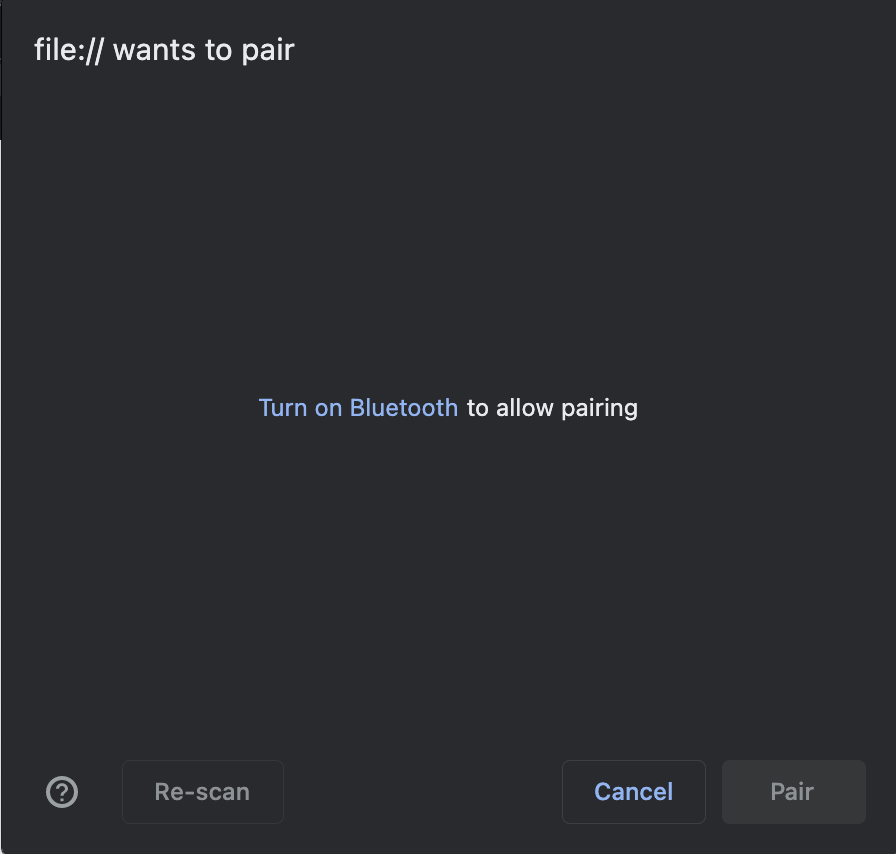
If not, you should see a list of devices around.

In our case, we are looking to find a specific peripheral with the name Nordic_HRM. Let’s create a filter to find that. When we are using a filter, we cannot set acceptAllDevices to true, so we can remove that from our code since it defaults to false anyway. Add the filter as shown below.
const device = await navigator.bluetooth.requestDevice({ filters: [ {name: deviceNameInput.value
    } ]
});
As you can see, we are fetching the value for name from our form, which we defined earlier as a constant named deviceNameInput.
For this filter to work, we have to give the exact name of the peripheral we are looking for. In my case, the peripheral name is Nordic_HRM, so I will put that name in the form and click the Connect button. And I should see my peripheral in the chrome prompt.

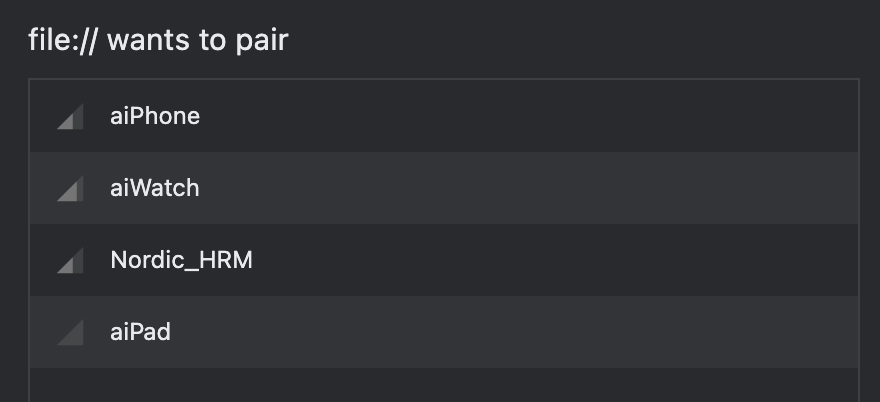
If we are unsure of the full name of the peripheral, we can also use namePrefix as part of our filter. We can even use both options, and it will scan for peripherals using an OR condition. That is, all peripherals that match either the namePrefix condition or the name condition will be shown in the list. For example, in the code below, I have hard-coded the namePrefix value and used the name as Nordic_HRM from the form:
const device = await navigator.bluetooth.requestDevice({ filters: [ {name: deviceNameInput.value
    }, {namePrefix: 'ai'
} ]
});
The result is as shown below:
The other options we can use in our filter include services where we can list either short form UUID or the full 128-bit UUID or even descriptors of the known services, e.g., heart_rate as well as manufacturerData which allows us to filter based on the company identifier.
Outside the filter, another option we can use is optionalServices which is different from services.
Consider the code snippet below.
const device = await navigator.bluetooth.requestDevice({ filters: [{ name: deviceNameInput.value, services: ['heart_rate']
    }], optionalServices: ['battery_service']
});
This will result in our Nordic_HRM being shown in the filtered list since it has both the heart rate and the battery service. If let’s say, battery service wasn’t available, the peripheral would still be discoverable since heart_rate is still present and is the required service.
IMPORTANT: Any service we need access to has to be listed either as part of the services filter or as optionalServices. If, in the above example we don’t mention battery_service anywhere, then we will not be able to read from it later and will only have access to the heart rate service. Hence it is important to list any service that we need at this point.
You might be wondering what is the point of optionalServices here since we can just list everything as part of the services filter. One common use case is that we can use optionalServices for a general scan with acceptAllDevices option as true and still be able to access relevant services later that we list as part of optionalServices. Other than that, it allows us to form flexible combinations and search for devices that will have certain services and not others.
In our case, we know that our peripheral has both the heart rate and battery service so now we can put both of them in the services array and update the code as follows.
const device = await navigator.bluetooth.requestDevice({ filters: [{ name: deviceNameInput.value, services: ['heart_rate', 'battery_service']
    }]
});
So now we have figured out how to search for peripherals in different ways. However, our users don’t really know that the search has commenced. Once we hit the Connect button, our status label should update to show that we are searching for the peripheral. To do this, we can simply update the textContent of our label as soon as the button is clicked. Add the following line just before the requestDevice() function.
connectionStatus.textContent = "SEARCHING";This works well if the user pairs with the peripheral however if the user cancels the dialog that shows the BLE peripherals the status text is still stuck at SEARCHING and there is error in the console .

We need to do some error handling here to update the text of the label accordingly. To do this, we will wrap our call to requestDevice() in a try-catch block. The catch part of this is where we will handle the error, which in this case is updating the text of the label.
The complete BLEManager() function at this point will be as shown below:
async function BLEManager() {
connectionStatus.textContent = "SEARCHING";
try {
const device = await navigator.bluetooth.requestDevice({ filters: [{ name: deviceNameInput.value, services: ['heart_rate', 'battery_service']
}]
});
} catch {
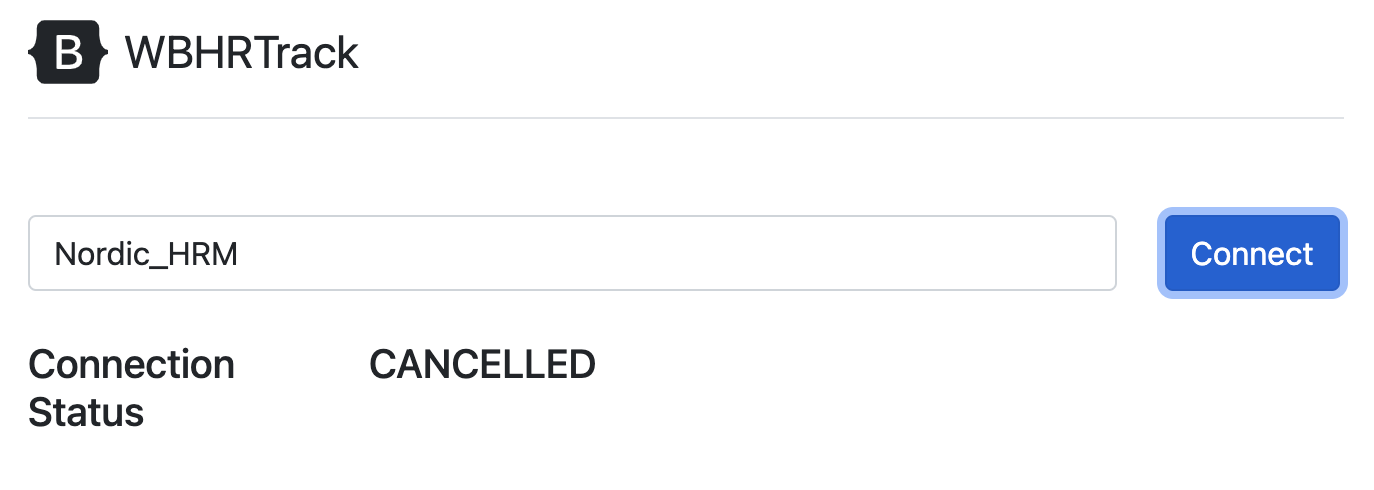
connectionStatus.textContent = "CANCELLED";
}
}If you save and run now, you will see that the console error disappears, and once you cancel the dialog or move away from the tab, the status will change from SEARCHING to CANCELLED.
We have covered a lot of ground in this section to be able to identify the device we want to connect to and handle the errors that can come about if things go wrong. In the next section we will establish a connection with the BLE peripheral and continue to explore its services and characteristics.
Establishing a Connection
When the dialog appears with a list of peripherals, there are two options given to us: Cancel the dialog or Pair with the selected device. If you select Nordic_HRM and click on Pair from the list, the peripheral device will continue to advertise as normal. If you search again, the dialog may show the device as paired.

So what’s happening here? Chrome remembers the peripheral, and since pairing was attempted, it shows the device as already paired. However, we haven’t connected to the peripheral yet despite clicking on the Pair button.
In order to connect with a peripheral, two things need to happen:
- The user has to explicitly select the peripheral from the list shown in the dialog and click the Pair button.
- The selected device must call the connect() function.
In the previous section, we used the requestDevice() function, which filters and shows the list of devices and then returns the device selected by the user. We aptly called it device.
To connect to this selected device, we need to call the asynchronous gatt.connect() function:
const connectedDevice = await device.gatt.connect()Note the use of the await keyword here once again. This is only executed after the earlier function has completed its execution. But what if the earlier function failed and we come directly to this call? We will not have a valid device to connect to, and so this will throw an error. Go ahead and try it out yourself.
This is why we will continue adding our code inside the earlier try-catch block
try {
    ....... const connectedDevice = await device.gatt.connect()
} catch {
connectionStatus.textContent = "CONNECTION FAILED"
}
Note that this call can fail intrinsically if there is a problem connecting to the device or it can fail because we haven’t even found the device we want. So the catch condition can be a bit smarter to detect the reason why it was triggered. We can do something like this:
if (typeof device !== 'undefined') {
    connectionStatus.textContent = "CONNECTION FAILED";
} else {
    connectionStatus.textContent = "CANCELLED";
}
While a lot more can be done, this is just an illustration and a reminder to consider the different cases and handle the error appropriately.
At this point, the BLEManager() function should look like this:
async function BLEManager() {
connectionStatus.textContent = "SEARCHING";
try {
const device = await navigator.bluetooth.requestDevice({ filters: [{ name: deviceNameInput.value, services: ['heart_rate', 'battery_service']
}]
});
const connectedDevice = await device.gatt.connect();
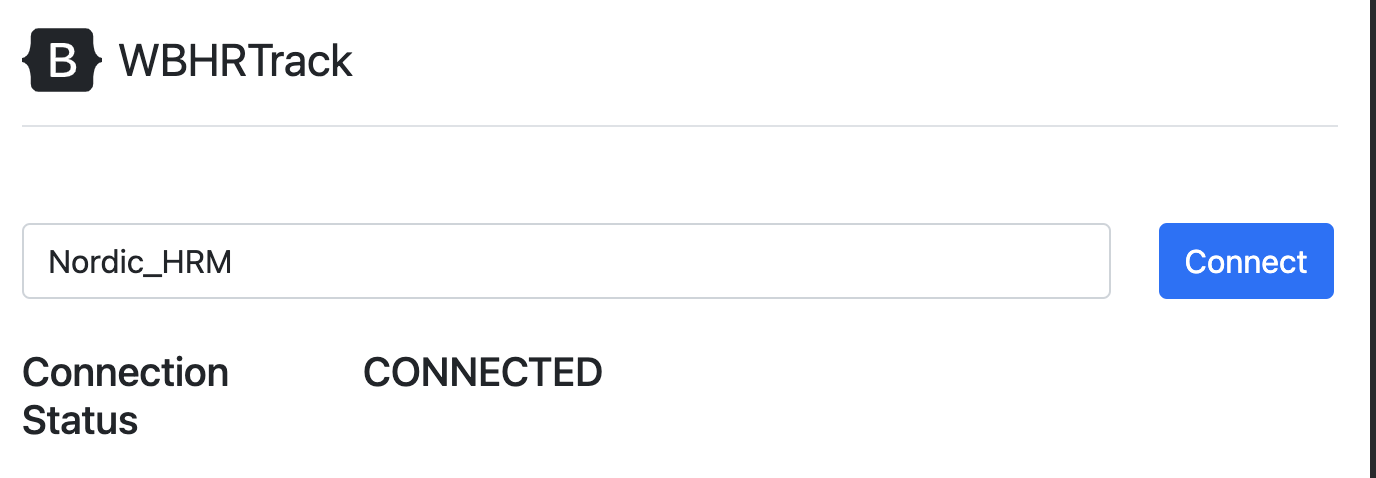
connectionStatus.textContent = "CONNECTED";
} catch {
if (typeof device !== 'undefined') {
connectionStatus.textContent = "CONNECTION FAILED";
} else {
connectionStatus.textContent = "CANCELLED"
}
}
}And if you try connecting to the device, you should be able to do that successfully with the label updating to show CONNECTED.
Discovering Services
Now that we have established a successful connection to our peripheral, we need to get its services to be able to discover the characteristics. Remember, we can only work with services that we listed as part of our services filter or optionalServices key when discovering devices.
In order to get the service from the server, we use its getPrimaryService() asynchronous method. Secondary services cannot be obtained using this method.
We have two primary services that we need: heart_rate and battery_service. We can get them as follows once the device is connected. Remember, we are still in the try block and just adding lines after the last status update.
const batteryService = await connectedDevice.getPrimaryService("battery_service");
const heartRateService = await connectedDevice.getPrimaryService("heart_rate");
At this point, we are not updating the status label, but if you want to see if this has been completed successfully, you can use console.log() and add helpful debug messages that you will see in the console confirming that you have reached this point of your code successfully.
console.log("Services obtained")Another useful idea is to set up error codes so that you know which Web Bluetooth function has failed and show the correct message to the user in the catch block based on it.
For example, we can define a global variable at the top:
var error_codeAnd then, after each BLE operation, update the value of the error_code. Subsequently, we can check where the error happens in the catch block of the code, as shown below:
try {
    // initialise
    error_code = 0;
    // scan for devices (requestDevice)
    error_code = 1;
    // connect to specific device
    error_code = 2;
    // get primary service
    error_code = 3;
} catch {
    if (error_code == 0) {
        // error during scanning
    }
    // other conditions
}
Discovering Characteristics
Next, we would like to find the characteristics of the heart rate measurement (in the heart rate service) and battery level (in the battery service).
This is performed by calling on the getCharacteristic() method on the service. This, like others, is also an asynchronous function, so we use the await keyword.
const batteryLevelCharacteristic = await batteryService.getCharacteristic("battery_level");
const heartRateCharacteristic = await heartRateService.getCharacteristic("heart_rate_measurement");
Note that we are using the characteristic names here for convenience, but we might just as well use the UUIDs as below.
const batteryLevelCharacteristic = await batteryService.getCharacteristic(0x2A19);
const heartRateCharacteristic = await heartRateService.getCharacteristic(0x2A37);
Finally, to get some feedback, we will also print a message on the console log.
console.log("Characteristics discovered")Save and refresh. You should be able to see the message printed on your console.
Reading from a Characteristic
To demonstrate reading data from a characteristic, we will read data from the battery level characteristic and display the value on the web page. We will do this by calling on the readValue() method of the characteristic.
const batteryLevel = await batteryLevelCharacteristic.readValue();We need to interpret this returned value correctly since this is just an array buffer. From the BLE specifications, we know that the battery level characteristic is between 0-100 and is of type Uint8.
So we will get this percentage level as below:
const batteryPercent = batteryLevel.getUint8(0);Once we have this, we can update the textContent of our label. To do this, first, we will define a global const in our script file to get the element with id batteryCharge.
const batteryCharge = document.getElementById("batteryCharge");Finally, we will update the textContent of batteryCharge as soon as we get the batteryPercent. Together this operation looks like the following three lines of code.
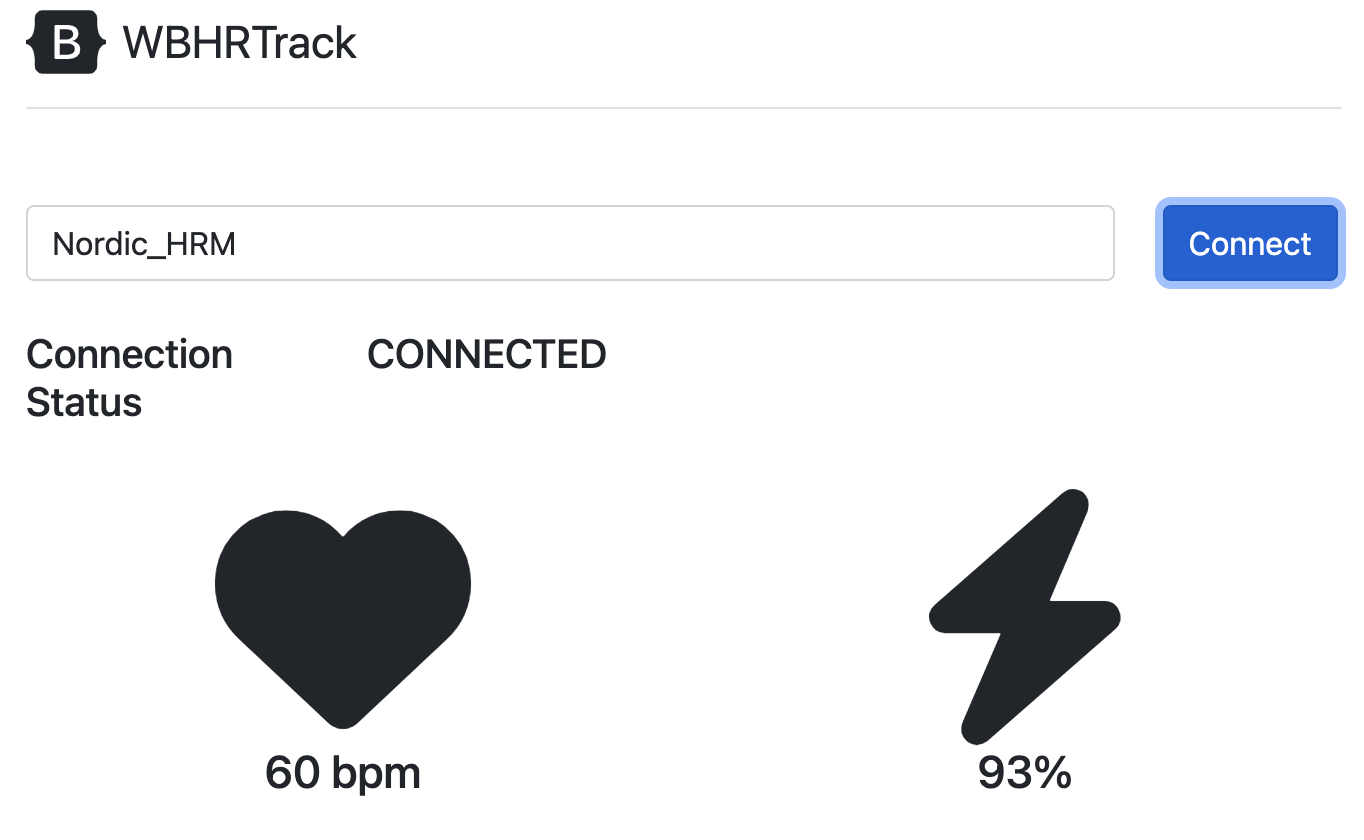
const batteryLevel = await batteryLevelCharacteristic.readValue();
const batteryPercent = batteryLevel.getUint8(0);
batteryCharge.textContent = batteryPercent.toString() + "%";
Try running this and you should see the battery level updating after connection.
Next Steps
If you’ve managed to get this far, congratulations! You have the start of a functional web app that uses the Web Bluetooth API to interact with nearby BLE devices. If you’ve been following along, you have:
- Scanned for BLE peripherals
- Created filters to find specific BLE peripherals
- Connected to a BLE peripheral
- Disconnected from a BLE peripheral
- Read from a characteristic
If you’d like to continue working on this example project and learn more about Web Bluetooth, check out the full project guide inside the Getting Started with Web Bluetooth course in the Bluetooth Developer Academy!
In addition to what we covered in this blog, in the full course, you will learn how to:
- Write to a characteristic
- Subscribe to notifications
- Unsubscribe from notifications
- Update the UI based on BLE events (triggered by user gestures or user actions)
- Handle errors
Note: The full course available within the Bluetooth Developer Academy was authored by Anas Imtiaz, Ph.D.
Final Notes about Web Bluetooth
Web Bluetooth is still classified as an experimental API that is in active development. There is a chance of functions and processes changing as the API matures, so keeping up to date with the documentation is highly recommended.
Additionally, the support of various API methods may differ across browsers, which is also something to keep in mind while developing web apps with Web Bluetooth. Nevertheless, the support is improving, and with time this is likely to become a standard across all major browsers.


